Summary: Even the most powerful gaming rigs can suffer from unexpected lag, stuttering, and low FPS — a frustrating paradox that affects thousands of gamers worldwide. This comprehensive guide, Fix Game Lagging on High-End PC, explores every root cause behind game lag on high-end PCs, from software misconfigurations and outdated drivers to thermal throttling, background process interference, network latency, and storage bottlenecks. By systematically diagnosing and applying the fixes outlined here, you can unlock the true performance your hardware is capable of delivering.
Table of Contents / Outline
- Why Does a High-End PC Still Lag in Games?
- Update and Optimize Your GPU Drivers
- Fix Power Settings and Windows Performance Mode
- Manage Background Processes and CPU Hogs
- Thermal Throttling: The Silent Performance Killer
- Optimize In-Game Graphics Settings
- Fix Game Stuttering with Storage and RAM Optimization
- Network Lag vs. In-Game Lag — Know the Difference
- DirectX, Game Mode, Hardware-Accelerated GPU Scheduling (HAGS)
- Advanced Fixes: BIOS Settings, XMP, and PCIe Configuration
- Game-Specific Lag Fixes and Config File Tweaks
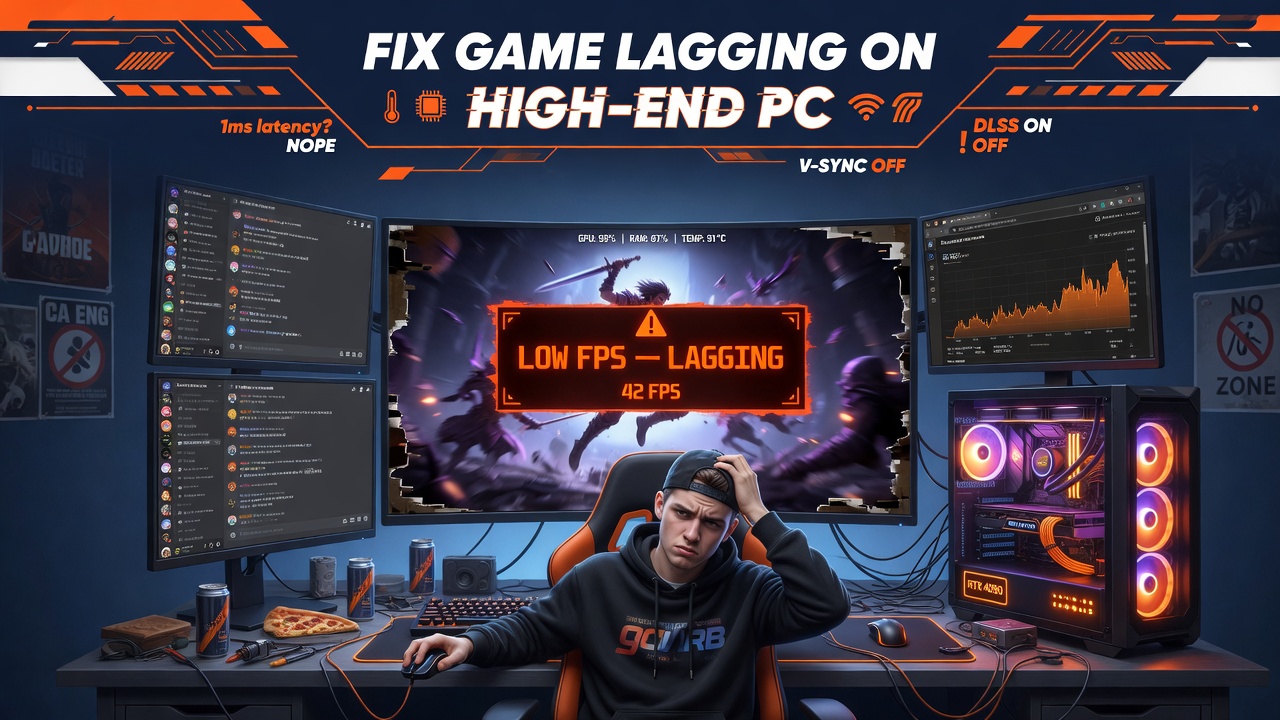
Why Does a High-End PC Still Lag in Games?
One of the most infuriating experiences in PC gaming is dropping $2,000+ on a rig loaded with the latest GPU, a blazing-fast CPU, and 32GB of DDR5 RAM — and still experiencing lag, frame drops, and stuttering. If this sounds familiar, you’re not alone. Millions of gamers search for “game lagging on high-end PC fix” every month because raw hardware power does not automatically translate to a smooth gaming experience.
The Difference Between FPS Drops, Stuttering, and Input Lag
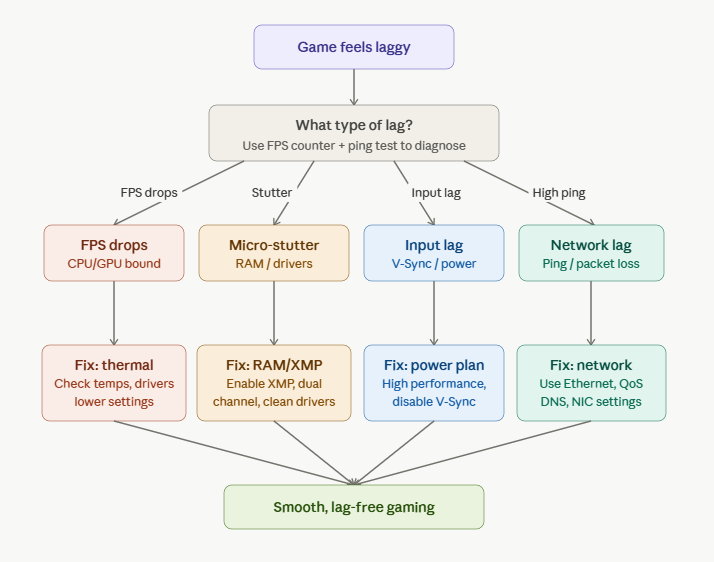
Before applying any fix, it’s critical to correctly identify the type of performance issue you’re dealing with. These are distinct problems with different root causes:
FPS Drops (Frame Rate Dips): Your average frame rate is fine, but it dips dramatically during certain moments — explosions, open-world transitions, or large player fights. This often points to a CPU bottleneck, VRAM overflow, or thermal throttling.
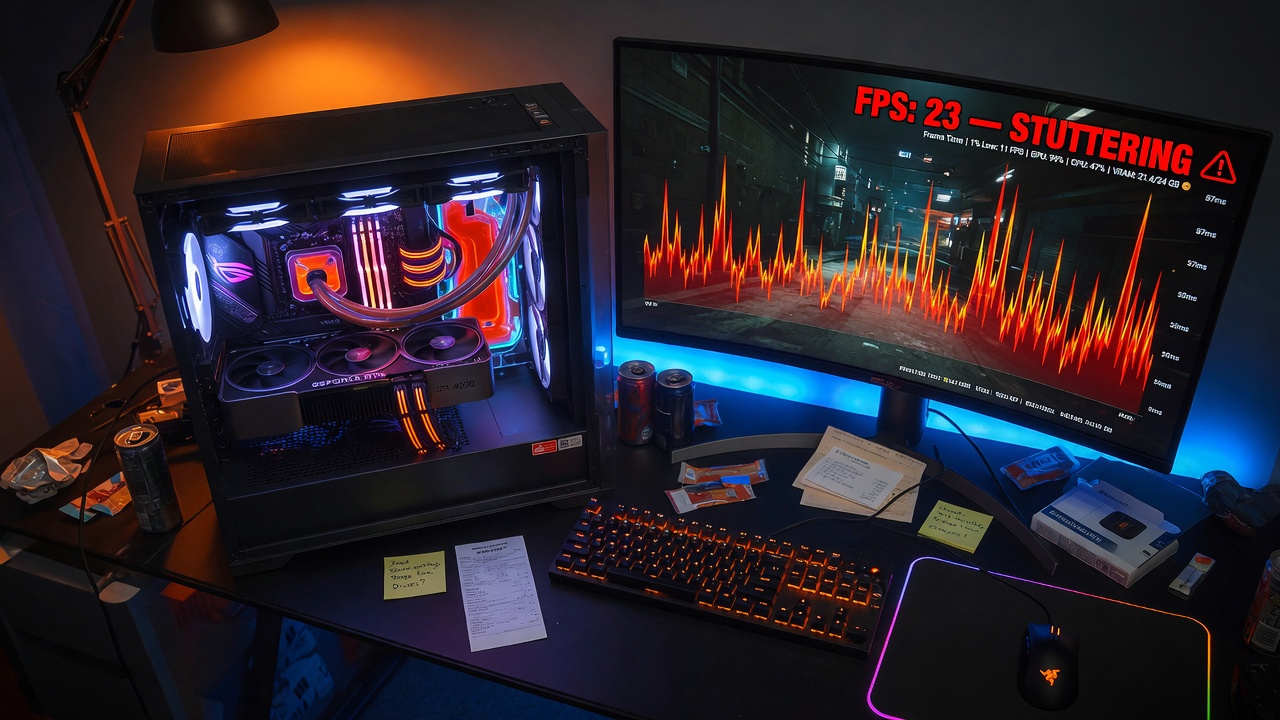
Micro-stuttering: The game appears choppy or “hitchy” even when the FPS counter reads smoothly. This is typically caused by frame time inconsistency — frames aren’t being delivered at even intervals. Culprits include driver issues, RAM running in single-channel mode, or shader compilation spikes.
Input Lag: Your controls feel delayed or “floaty.” This isn’t always a frame rate issue — it can stem from V-Sync forcing input buffering, a monitor running at the wrong refresh rate, or Windows running in “Balanced” power mode.
Network/Online Lag: High ping, rubber-banding, and disconnects in multiplayer games. This is a network-side issue unrelated to your hardware performance.
Understanding which type of lag you’re experiencing is the first diagnostic step — an NLP framework for problem-solving — because throwing GPU settings at an input lag problem will yield zero results.
Hardware vs. Software Root Causes
Modern gaming lag almost always has a software or configuration layer in front of it, even when hardware is the underlying constraint. The most common software-side lag factors include:
- Outdated or corrupt GPU drivers
- Windows power plan misconfigurations
- Background processes are stealing CPU and RAM bandwidth
- Incorrect in-game graphics settings
- Disabled XMP/EXPO in BIOS (RAM running at base speed)
- Hardware-Accelerated GPU Scheduling (HAGS) conflicts
Hardware-side causes include thermal throttling from inadequate cooling, VRAM saturation at high resolutions, or a PCIe bandwidth mismatch.
Update and Optimize Your GPU Drivers
How Outdated or Corrupt Drivers Cause Game Lag
Your GPU driver is the critical software bridge between Windows, your game, and your graphics hardware. Outdated drivers lack optimizations for newer games, while corrupt driver installations cause frame time spikes, crashes, and stuttering even on premium hardware like an RTX 4090 or RX 7900 XTX.
Many gamers assume that if their GPU is working, their drivers are fine. This is a common misconception. A driver can be technically functional while being months behind on game-specific patches. NVIDIA and AMD regularly release Game Ready or Adrenalin driver updates specifically optimized for new titles — skipping these updates often means leaving significant performance on the table.
Symptoms of driver issues include sudden FPS drops in specific titles, green/black screen artifacts, GPU usage spiking erratically in Task Manager, and shader compilation stutters.
Performing a Clean Driver Installation
A clean driver install removes all registry entries, leftover DLL files, and configuration data from previous versions. Here’s how to do it properly:
- Download Display Driver Uninstaller (DDU) — the industry-standard tool for complete driver removal.
- Boot into Safe Mode (press F8 during startup or use System Configuration → Boot → Safe boot).
- Run DDU and select “Clean and restart.”
- After reboot, download the latest driver directly from NVIDIA.com or AMD.com (not Windows Update).
- Run the installer and select Custom Installation → Perform a clean install.
This process resolves the majority of driver-related stuttering and lag issues. Always pair a new driver with a reboot before testing in-game.
Fix Power Settings and Windows Performance Mode
Why “Balanced” Power Plan Throttles Your GPU and CPU
Windows ships with the “Balanced” power plan as the default — a setting designed to conserve energy that actively throttles your CPU clock speeds during gaming. Your RTX 4080 can’t run at full speed if your i9 processor is being artificially capped to save watts.
In balanced mode, Windows dynamically lowers CPU frequency during perceived “low-load” periods — which gaming workloads sometimes misidentify, causing sudden FPS dips. Additionally, some motherboards implement their own power-saving states via C-states in BIOS, compounding the issue.
Enabling Ultimate Performance Mode in Windows
Windows 10 and 11 include a hidden “Ultimate Performance” power plan designed for workstations. Here’s how to enable it:
Open Command Prompt as Administrator and run: powercfg -duplicatescheme e9a42b02-d5df-448d-aa00-03f14749eb61
Then open Power Options, and you’ll see “Ultimate Performance” as a new plan. Select it. This disables all CPU throttling, keeps all cores at maximum frequency, and eliminates the power management delays that cause micro-stuttering.
Additionally, navigate to Device Manager → Display Adapters → [Your GPU] → Properties → Power Management and uncheck “Allow the computer to turn off this device to save power.”
Manage Background Processes and CPU Hogs
Identifying Resource-Stealing Applications
Even a 24-core CPU can be bottlenecked by poorly written background software. Antivirus real-time scanning, Windows Update, Discord video processing, browser hardware acceleration, and cloud backup services (OneDrive, Google Drive) all compete for CPU cycles and RAM bandwidth during gaming.
Use Process Hacker 2 or Task Manager sorted by CPU and GPU usage to identify offenders. Pay special attention to processes consuming more than 2% CPU consistently during gaming sessions. Common culprits include:
- Windows Defender real-time protection (schedule full scans during off-hours instead)
- Xbox Game Bar (high background CPU in some Windows 11 builds)
- GeForce Experience overlay (disable if not using ShadowPlay)
- Steam client update processes
- Web browsers running hardware-accelerated tabs
Disabling Startup Programs and Services
Press Ctrl + Shift + Esc, click the Startup tab, and disable everything non-essential. Then open msconfig → Services → Hide all Microsoft services, and disable third-party services you don’t actively need.
For advanced users, tools like O&O ShutUp10++ let you disable telemetry, background tasks, and Windows features that consume system resources without user-facing benefit.
Thermal Throttling: The Silent Performance Killer

How to Monitor CPU and GPU Temperatures
Thermal throttling is one of the most underdiagnosed causes of game lag on high-end PCs. When a CPU or GPU exceeds its thermal design limit (TDL), the hardware automatically reduces clock speeds to prevent damage, directly causing FPS drops and stuttering that users often misattribute to software problems.
Modern CPUs like the Intel Core i9-14900K or AMD Ryzen 9 7950X begin throttling at around 95–100°C. High-end GPUs typically throttle above 83–90°C, depending on the manufacturer. Download HWiNFO64 or MSI Afterburner and run them during a gaming session. Watch for:
- CPU temps exceeding 90°C under load
- GPU temps above 85°C for more than a few minutes
- CPU or GPU clock speeds dropping mid-game (visible in the graphs)
Cleaning, Reseating Coolers, and Reapplying Thermal Paste
If your temperatures are high, the most impactful fixes are:
Clean your PC interior: Dust on heatsink fins and case fans dramatically reduces thermal performance. Use compressed air on the heatsink, GPU cooler, and intake/exhaust fans. For cases used longer than 12 months, this alone can drop temps by 10–15°C.
Reapply thermal paste: Thermal paste dries out over 2–3 years. Remove the CPU cooler, clean the old paste with isopropyl alcohol (90%+), and apply a fresh pea-sized drop of high-quality paste like Thermal Grizzly Kryonaut or Noctua NT-H2.
Improve case airflow: Ensure you have positive pressure airflow (more intake than exhaust fans). Use at least two 120mm front intake fans and one rear exhaust. Verify that no cables are blocking fan intake paths.
Undervolt your GPU: Using MSI Afterburner’s voltage/frequency curve editor, you can reduce GPU voltage at target clock speeds. This lowers temperatures by 5–15°C and often eliminates thermal throttling without reducing performance — sometimes improving it due to better sustained clocks.
Optimize In-Game Graphics Settings
Settings That Tank FPS the Most
Not all graphics settings are equal. Some have enormous performance costs with marginal visual gains. The biggest FPS killers on high-end hardware are:
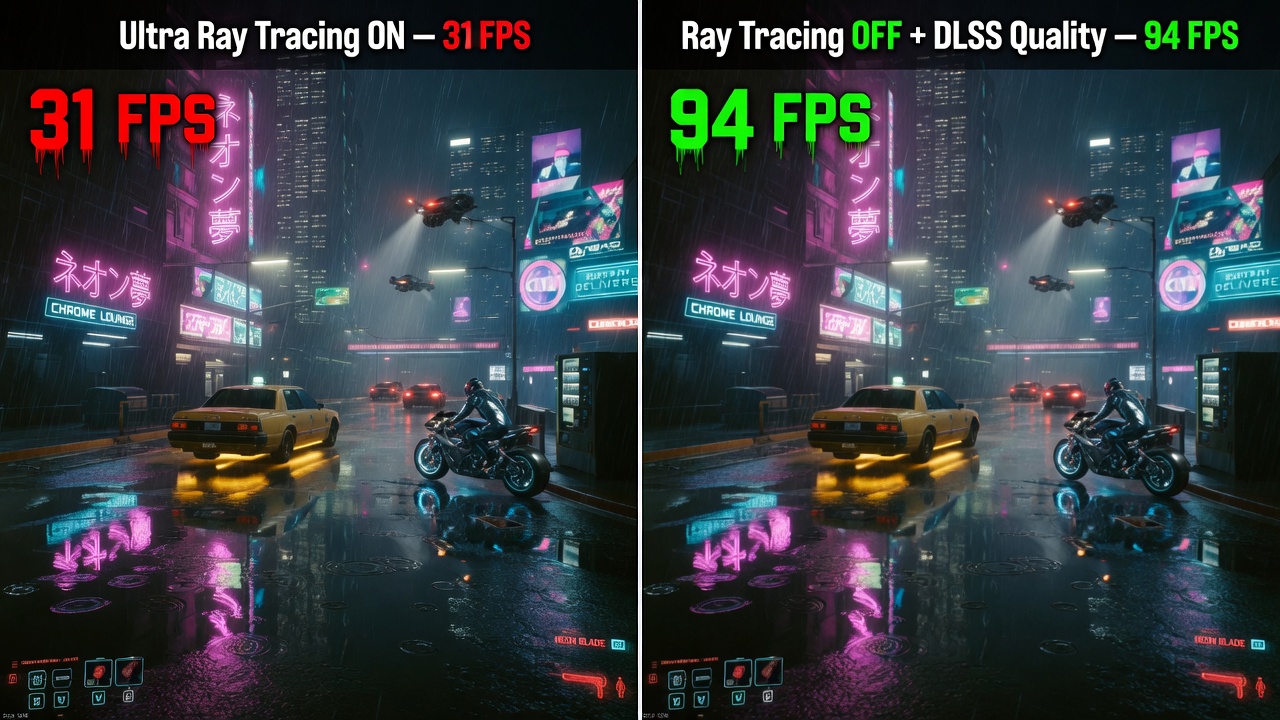
Ray Tracing: Ray-traced shadows, reflections, and global illumination can cut GPU performance by 40–60%. On GPUs below the RTX 4080 tier, disabling ray tracing entirely and using traditional rasterization is almost always the right call.
Ambient Occlusion at Ultra: HBAO+ and RTAO are extremely expensive. Set to Medium or SSAO for significant performance recovery with minimal visual loss.
Anti-Aliasing at TAA High: TAA itself is cheap, but games with poorly tuned TAA implementations introduce massive amounts of ghosting and blur. Switch to DLAA or MSAA x4 where available.
Shadow Distance and Quality: Ultra shadow distances require massive amounts of VRAM and GPU compute. Reducing shadow quality from Ultra to High recovers 5–15% FPS in many open-world games with nearly invisible visual difference.
Volumetric Fog and Clouds at Ultra: These are extremely expensive on the render pipeline. Setting to Medium has almost no perceptible visual impact.
Resolution Scaling, DLSS, FSR, and XeSS
AI and algorithmic upscaling technologies are transformative for high-end PC gaming performance. They work by rendering the game at a lower internal resolution and using AI or spatial algorithms to reconstruct a sharper image at your native resolution.
DLSS 3.5 (NVIDIA): The gold standard. Frame Generation adds AI-generated frames between rendered ones, doubling perceived frame rate with minimal input lag increase. Requires RTX 40-series. DLSS Super Resolution works on RTX 20/30/40 cards and provides excellent image quality at Quality or Balanced modes.
FSR 3.1 (AMD): Works on all GPUs, including NVIDIA cards. Frame Generation requires native AMD or implementation support. Image quality is close to DLSS Quality mode in most games. Available in a huge library of titles.
XeSS (Intel): Works on all GPUs and uses machine learning on Intel Arc cards. A solid DLSS alternative for non-NVIDIA hardware.
For a deeper understanding of how these upscaling technologies work under the hood, Digital Foundry’s technical breakdown of DLSS vs FSR vs XeSS provides detailed frame analysis and image quality comparisons across dozens of titles.
Fix Game Stuttering with Storage and RAM Optimization
HDD vs. SSD for Gaming — Why It Still Matters
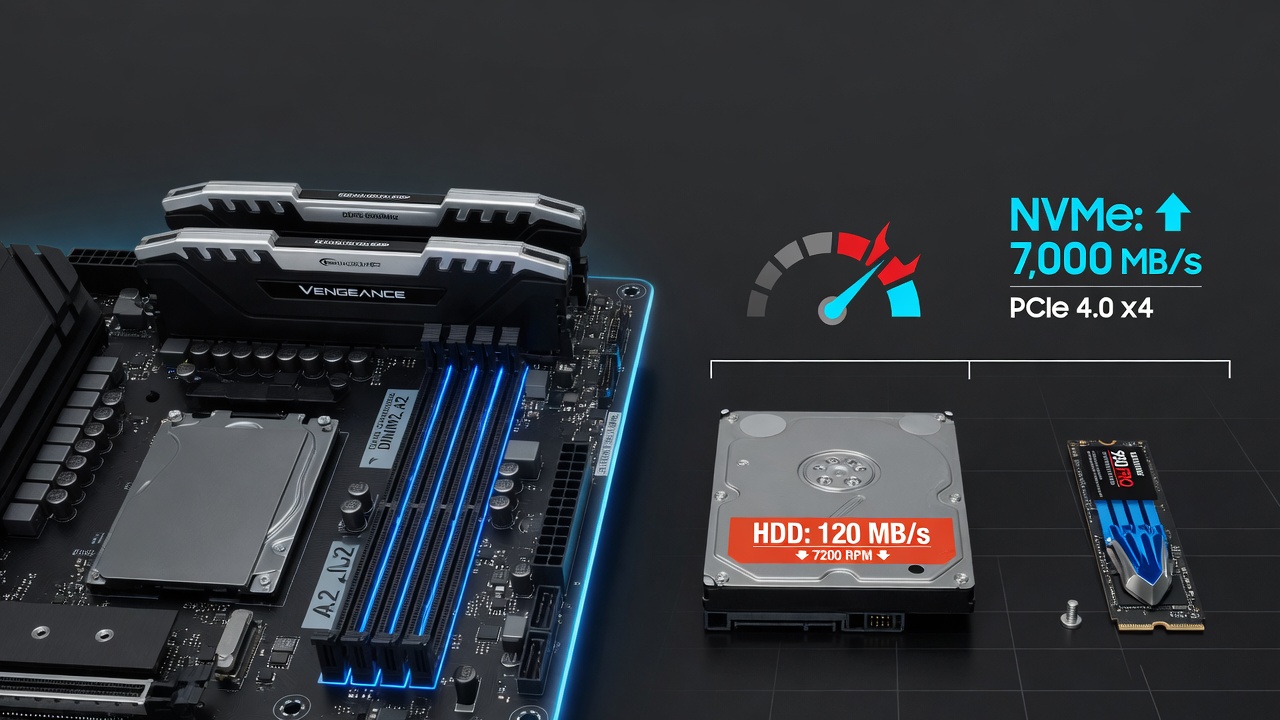
Even in 2025, some gamers still run games from a mechanical hard drive (HDD) while their OS runs on SSD. This configuration causes massive shader compilation stutters, long loading screens, and texture streaming hitches as the game constantly reads assets from a slow-spinning disk.
The minimum acceptable storage for gaming is a SATA SSD, which delivers sequential read speeds of 500–550 MB/s compared to an HDD’s 80–120 MB/s. However, for open-world games with large streaming asset budgets (like Cyberpunk 2077, Starfield, or GTA VI), an NVMe PCIe 4.0 SSD delivering 5,000–7,000 MB/s sequential reads provides noticeably smoother texture streaming and eliminates most loading-related stutters.
Additionally, ensure Windows is not using your gaming drive as a paging file. Set a fixed pagefile of 1.5× your RAM size on your fastest NVMe drive.
RAM Speed, Dual-Channel, and XMP/EXPO Profiles
This is one of the most overlooked performance fixes and perhaps the highest-impact one relative to cost. DDR5 or DDR4 RAM ships set to a conservative base JEDEC speed by default — often 2133MHz or 4800MHz — regardless of what the packaging says.
Dual-Channel vs. Single-Channel: If you have two RAM sticks, they must be installed in the correct paired slots (usually slots 2 and 4, not 1 and 2, but check your motherboard manual). Single-channel operation cuts available memory bandwidth roughly in half, causing severe CPU-side bottlenecks and frame time spikes in CPU-intensive games.
Enable XMP (Intel) or EXPO (AMD) in BIOS: This profile enables your RAM to run at its rated speed (e.g., DDR5-6000 instead of DDR5-4800). The process is simple: enter BIOS (usually F2 or DEL at POST), find the XMP/EXPO setting, and enable the highest listed profile. This single change can improve gaming FPS by 10–20% on AMD Ryzen platforms specifically, as Ryzen CPUs are heavily bandwidth-sensitive.
Also, look for an internal link that may help you with connectivity troubleshooting as well: if you encounter internet issues while gaming online, check out this guide on how to Fix “ERR_CONNECTION_REFUSED” Error in Chrome — it covers network stack issues that can affect your gaming connection.
Network Lag vs. In-Game Lag — Know the Difference
Reducing Ping, Packet Loss, and Jitter
High ping (latency), packet loss, and jitter are distinct network issues that all manifest as “lag” in online games but have very different fixes. Ping is your round-trip time to the server — ideally below 40ms for competitive play. Packet loss means data is being dropped between you and the server, causing rubber-banding and teleportation. Jitter is irregular variation in ping, causing inconsistent hit registration.
Key fixes for network-side lag:
Switch to Ethernet: Wi-Fi, even Wi-Fi 6E, introduces latency variation and packet loss that wired connections avoid entirely. A direct Cat6 Ethernet connection to your router will typically reduce ping by 2–5ms and nearly eliminate jitter.
Connect to the closest server region: Most games auto-select servers, but you can manually select your regional server in the settings. Verify this selection is optimal.
Use a gaming router with QoS: Quality of Service (QoS) prioritizes game traffic over other household devices. Routers with dedicated gaming QoS (ASUS ROG, NETGEAR Nighthawk) make a measurable difference in multi-device households.
Update your DNS: Switching from your ISP’s default DNS to Cloudflare (1.1.1.1) or Google DNS (8.8.8.8) can reduce domain resolution latency, which affects game matchmaking and server connection times.
Optimizing Network Adapter Settings
Navigate to Device Manager → Network Adapters → [Your NIC] → Properties → Advanced and make these changes:
- Interrupt Moderation: Disabled (reduces latency at the cost of slightly higher CPU usage)
- Receive Buffers / Transmit Buffers: Set to maximum
- Energy Efficient Ethernet: Disabled
- Flow Control: Disabled
- Speed & Duplex: Force to 1.0 Gbps Full Duplex
DirectX, Game Mode, Hardware-Accelerated GPU Scheduling (HAGS)
When HAGS Helps and When It Hurts
Hardware-Accelerated GPU Scheduling (HAGS) is a Windows feature that shifts GPU memory scheduling from the CPU to the GPU itself, theoretically reducing latency. In practice, HAGS is beneficial on modern GPU-CPU combinations but can cause stuttering on older setups.
Enable HAGS if you have: RTX 3000/4000 series or RX 6000/7000 series GPU, paired with a Ryzen 5000/7000 or Intel 12th/13th/14th gen CPU, running Windows 10 21H2 or later.
Disable HAGS if you have: Older GPU/CPU combinations, or if you notice increased micro-stuttering after enabling it. Navigate to Settings → Display → Graphics → Change default graphics settings → Hardware-accelerated GPU scheduling.
Enabling and Testing DirectX 12 Ultimate
Many games still default to DirectX 11 even when the game supports DirectX 12 or DirectX 12 Ultimate. DX12 provides better multi-core CPU utilization, reduced driver overhead, and access to features like Mesh Shaders and DirectStorage.
In the game’s settings, look for an API or rendering backend option and switch from DX11 to DX12. Note that some older DX12 implementations in games from 2018–2020 are actually worse than DX11 due to poor optimization — test both and use benchmark results to decide.
DirectStorage: If your game supports DirectStorage (Forspoken, Ratchet & Clank: Rift Apart, and others), ensure you have an NVMe SSD. DirectStorage uses the GPU to decompress game assets directly from the SSD, bypassing the CPU entirely and dramatically reducing load times and streaming stutters.
Advanced Fixes: BIOS Settings, XMP, and PCIe Configuration
Enabling XMP/EXPO for RAM Performance
As covered in the RAM section, enabling XMP or EXPO in your BIOS is essential. But there are additional BIOS settings worth configuring for gaming performance:
Disable C-States: CPU C-states are low-power idle modes. C6 and C7 states in particular can cause latency spikes as the CPU wakes up from deep sleep. In BIOS under CPU Power Management, disable C6/C7 states. Note: this slightly increases idle power consumption.
Resizable BAR (Smart Access Memory): Ensure Resizable BAR is enabled in BIOS. This feature allows the CPU to directly access the full GPU VRAM, rather than just a 256MB window at a time, improving performance by 5–15% in supported games. It requires a compatible CPU (Intel 10th gen+ or Ryzen 3000+), GPU (RTX 30/40 or RX 6000/7000), and a motherboard with BIOS support.
PCIe Bandwidth and GPU Slot Configuration
Ensure your GPU is seated in the primary PCIe x16 slot — the top slot closest to the CPU. This slot has the full PCIe 4.0 or 5.0 x16 bandwidth (up to 64 GB/s on PCIe 5.0). Accidentally installing your GPU in a secondary slot may result in x4 or x8 bandwidth, which can bottleneck GPU data transfer on high-end cards.
In your BIOS, verify the PCIe slot is configured for Auto or Gen 4/5, not forced to Gen 3.
Game-Specific Lag Fixes and Config File Tweaks
Config File Optimizations for Popular Games
Many games have .ini or .cfg configuration files that expose settings not available in the in-game UI. For example:
Valorant: Adding bAllowNVIDIAReflex=True and bPreferD3D12InGame=1 to your GameUserSettings.ini can reduce input lag significantly.
Cyberpunk 2077: Disabling HDR through the config file on SDR monitors prevents the game from routing through an unnecessary color conversion layer, reducing CPU overhead.
Escape from Tarkov: The game’s Unity configuration allows you to set VSync Count to 0 and enable low-latency mode via launch parameters.
Always back up config files before modifying them, and research game-specific communities (Reddit, Steam forums) for the latest recommended settings.
Shader Compilation Stuttering and How to Fix It
Shader compilation stuttering is a specific type of stutter that occurs when a game encounters a new visual effect it hasn’t yet compiled for your GPU. It’s common in DX12/Vulkan games on first play or after driver updates. The game pauses for a fraction of a second as the shader is compiled — this is most noticeable in games using Epic’s Unreal Engine 5, such as The Finals, Fortnite, and Black Myth: Wukong.
Fix 1: Pre-compile shaders. Some games (like Call of Duty) have a shader pre-compilation step in the settings menu. Run it before playing. It takes 5–20 minutes but eliminates in-game shader stutter entirely.
Fix 2: Delete the shader cache and let it rebuild. Navigate to %appdata% and your GPU driver’s shader cache folder and delete stale entries. NVIDIA’s cache is typically in C:\Users\[Username]\AppData\Local\NVIDIA\DXCache.
Fix 3: Use Vulkan if available. Vulkan’s pipeline cache is often better managed than DX12 in many game implementations, reducing first-frame shader stutter.
If you’re also managing gaming content or social media alongside your gaming hobby, the Instagram Caption Character Counter tool can help you craft perfect captions for sharing your gaming highlights — staying within Instagram’s character limits every time.
Final Checklist: Quick-Reference Fix Summary
Here’s a consolidated action list organized by impact level:
Highest impact (do these first):
- Enable XMP/EXPO in BIOS for RAM speed
- Install the GPU in primary PCIe x16 slot
- Perform a clean GPU driver installation
- Set Windows to the Ultimate Performance power plan
- Enable Resizable BAR / Smart Access Memory
High impact: 6. Monitor and fix thermal throttling (clean PC, repaste CPU) 7. Ensure RAM is in dual-channel configuration 8. Move games to NVMe SSD 9. Disable background apps (antivirus scanning, Xbox Game Bar, browser) 10. Switch to Ethernet for online gaming
Moderate impact: 11. Enable/test HAGS based on your hardware 12. Switch to DX12 if the game supports it 13. Run shader pre-compilation 14. Disable power-saving features in Network Adapter settings 15. Optimize in-game settings (disable ray tracing, reduce shadow quality)
Fine-tuning: 16. Enable DLSS/FSR/XeSS upscaling 17. Disable C6/C7 CPU states in BIOS 18. Use per-game config file tweaks 19. Switch DNS to 1.1.1.1 20. Use QoS on the router for gaming traffic priority