Summary
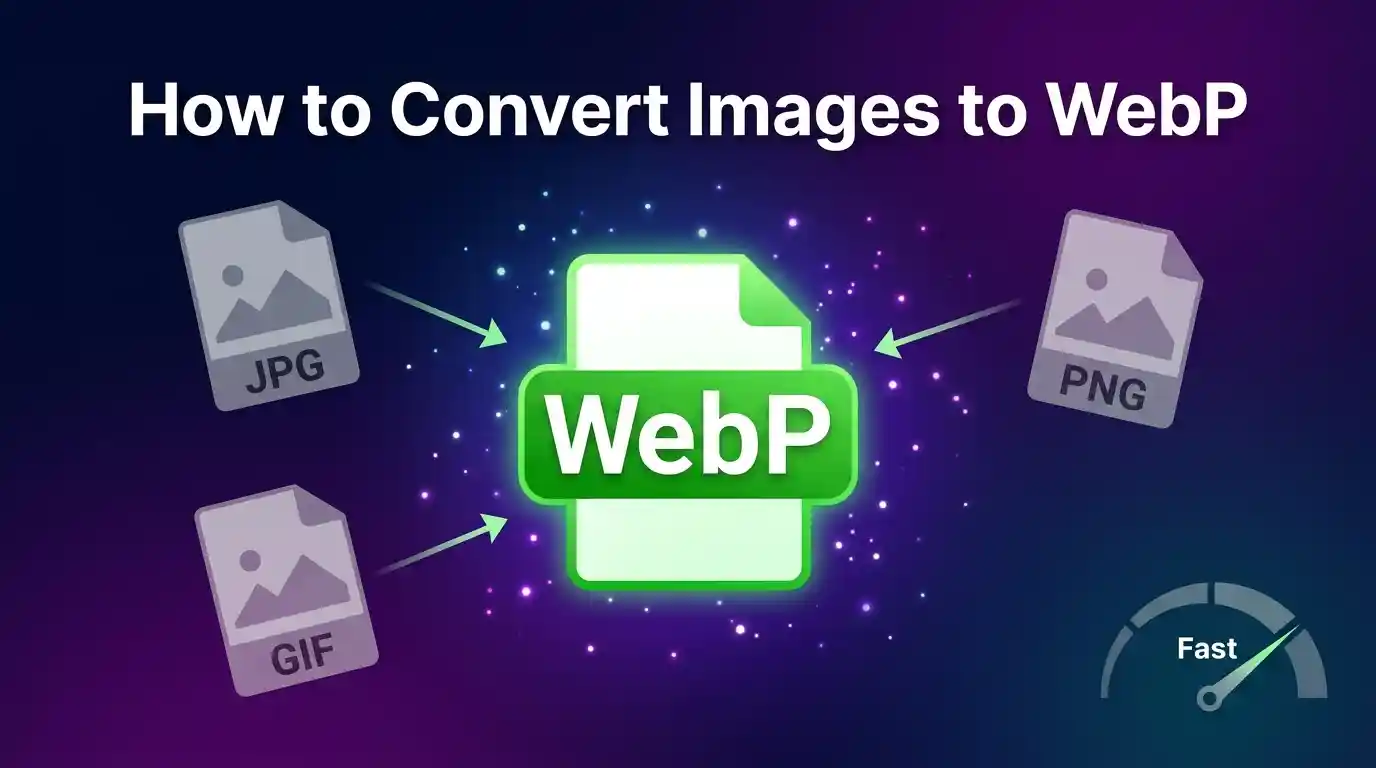
Converting images to WebP is one of the smartest optimizations you can make for website performance. WebP is a modern image format developed by Google that delivers superior lossless and lossy compression, resulting in smaller file sizes without sacrificing visual quality. This guide covers every method to convert JPG, PNG, GIF, and other formats to WebP — from online tools and desktop software to command-line interfaces and code-based solutions — helping developers, designers, and content creators reduce page load times, improve Core Web Vitals scores, and deliver a better user experience across all devices and browsers.
Table of Contents / Outline
- What Is WebP and Why Should You Convert to It?
- How to Convert Images to WebP Using Online Tools
- How to Convert Images to WebP in Photoshop
- How to Convert Images to WebP Using GIMP (Free)
- How to Convert Images to WebP with Command-Line Tools (cwebp)
- How to Batch Convert Images to WebP
- How to Convert Images to WebP in WordPress
- How to Convert Images to WebP Using Code (Python, JavaScript, PHP)
- WebP Conversion Best Practices: Quality, Compression & Settings
- Browser Support and Fallback Strategies for WebP
- FAQs About Converting Images to WebP
What Is WebP and Why Should You Convert to It?
Before diving into conversion methods, it helps to understand what makes WebP worth the effort. If you want a deeper technical breakdown, read this guide on What Is WebP Format to understand its architecture, compression algorithms, and origins.
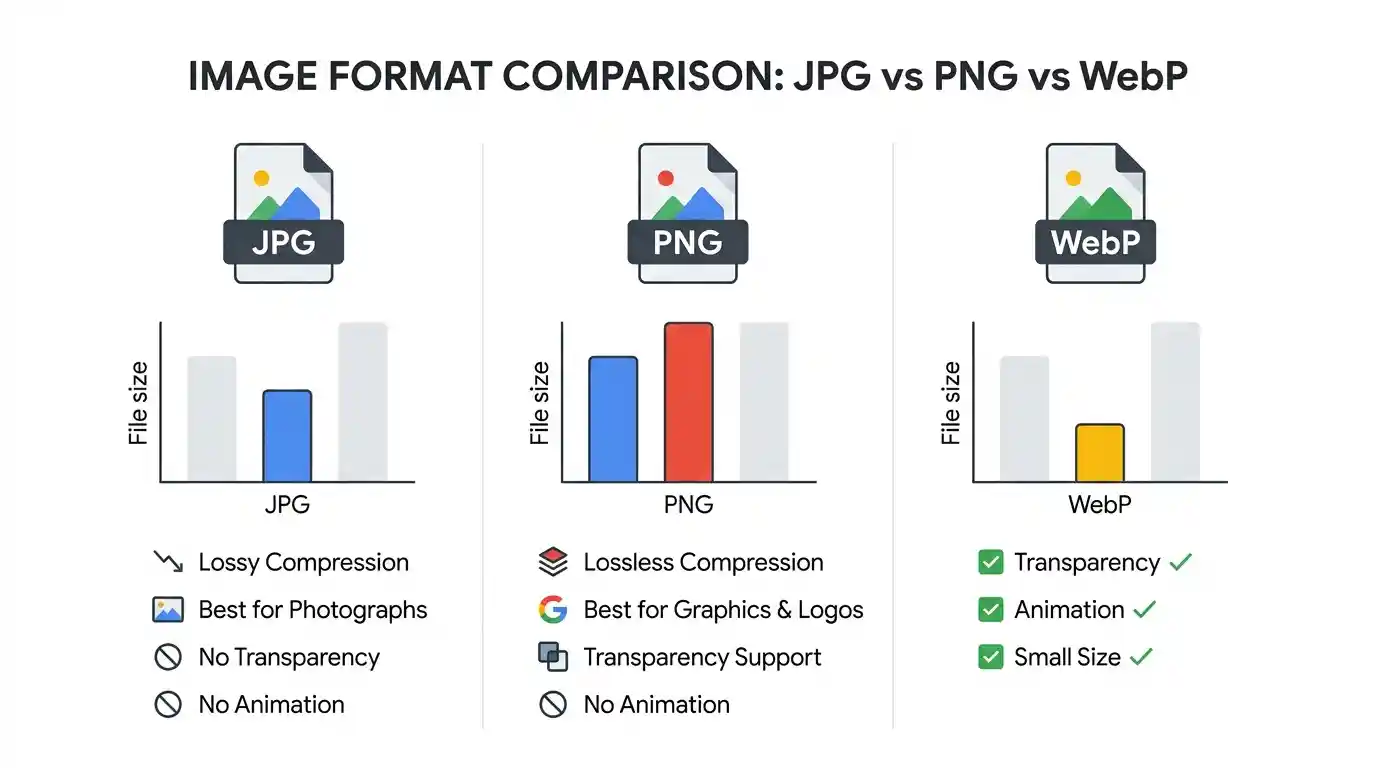
WebP is an image format introduced by Google in 2010. It supports both lossy and lossless compression, transparency (alpha channel), and even animation — making it a direct competitor to JPG, PNG, and GIF simultaneously.
Why WebP Files Are Smaller
WebP uses a predictive coding model borrowed from the VP8 video codec. For lossy compression, it analyzes neighboring pixel blocks and encodes only the differences, reducing redundancy far more efficiently than JPEG’s DCT (Discrete Cosine Transform) method. For lossless images, WebP uses advanced entropy coding and palette transforms.
The result? According to Google’s own benchmarks, WebP lossy images are 25–34% smaller than comparable JPEGs, and WebP lossless images are 26% smaller than PNGs.
SEO and Performance Benefits
- Faster page load times — smaller images mean less data transferred
- Improved Core Web Vitals — particularly Largest Contentful Paint (LCP)
- Better Google PageSpeed Insights scores
- Lower bandwidth consumption — critical for mobile users
- Reduced server storage costs
For a broader perspective on choosing the right format for your site, check out this article on the Best Image Format for Websites.
How to Convert Images to WebP Using Online Tools
Online converters are the fastest, zero-installation solution for individuals and small teams. They work directly in your browser and support drag-and-drop workflows.
Step-by-Step: Using an Online WebP Converter
- Open a reliable WebP Converter in your browser
- Upload your source image (JPG, PNG, BMP, TIFF, or GIF)
- Set your desired quality level (typically 75–85 for a good size-to-quality ratio)
- Click Convert or Download
- Save the .webp file to your local storage
What to Look for in an Online Tool
- No file size limit or a generous one (at least 10MB)
- Batch upload support to process multiple images simultaneously
- Quality slider for fine-grained control
- Privacy guarantee — images should not be stored on servers
- HTTPS connection to protect file transfers
Popular Online Conversion Tools
Several platforms offer reliable WebP conversion, including Squoosh (by Google), CloudConvert, Convertio, and dedicated image optimization platforms. Squoosh is particularly recommended for developers because it provides a real-time side-by-side comparison of original vs. converted images with exact file size readings.
How to Convert Images to WebP in Photoshop
Adobe Photoshop added native WebP support starting with version 23.2 (February 2022). If you are on an older version, you need a plugin.
Using Photoshop CC 2022 or Later
- Open your image in Photoshop
- Go to File → Export → Export As
- In the Format dropdown, select WebP
- Adjust quality (0–100), resize if needed, and set metadata options
- Click Export All and choose your save location
Alternatively, use File → Save a Copy and select WebP from the format list.
Lossy vs. Lossless in Photoshop
Photoshop’s WebP export dialog gives you the choice between:
- Lossy: Smaller file, slight quality reduction. Best for photographs.
- Lossless: Larger file, pixel-perfect reproduction. Best for logos and graphics with flat color.
For Older Photoshop Versions
Install the WebP Photoshop Plugin from Telegraphics (free, open-source). After installation, WebP appears as an available format under Save As.
How to Convert Images to WebP Using GIMP (Free)
GIMP is a powerful free image editor that has supported WebP natively since version 2.10.
Step-by-Step in GIMP
- Open your image via File → Open
- Go to File → Export As (not “Save As” — GIMP distinguishes between the two)
- In the filename field, type your filename with the .webp extension
- Click Export
- A WebP options dialog appears — adjust Quality (0–100), choose between Lossy/Lossless, and optionally enable Save background color, Save Exif data, or Save ICC profile
- Click Export to finalize
GIMP also supports saving images with transparency preserved, making it ideal for PNG-to-WebP conversions where alpha channels matter.
How to Convert Images to WebP with Command-Line Tools (cwebp)
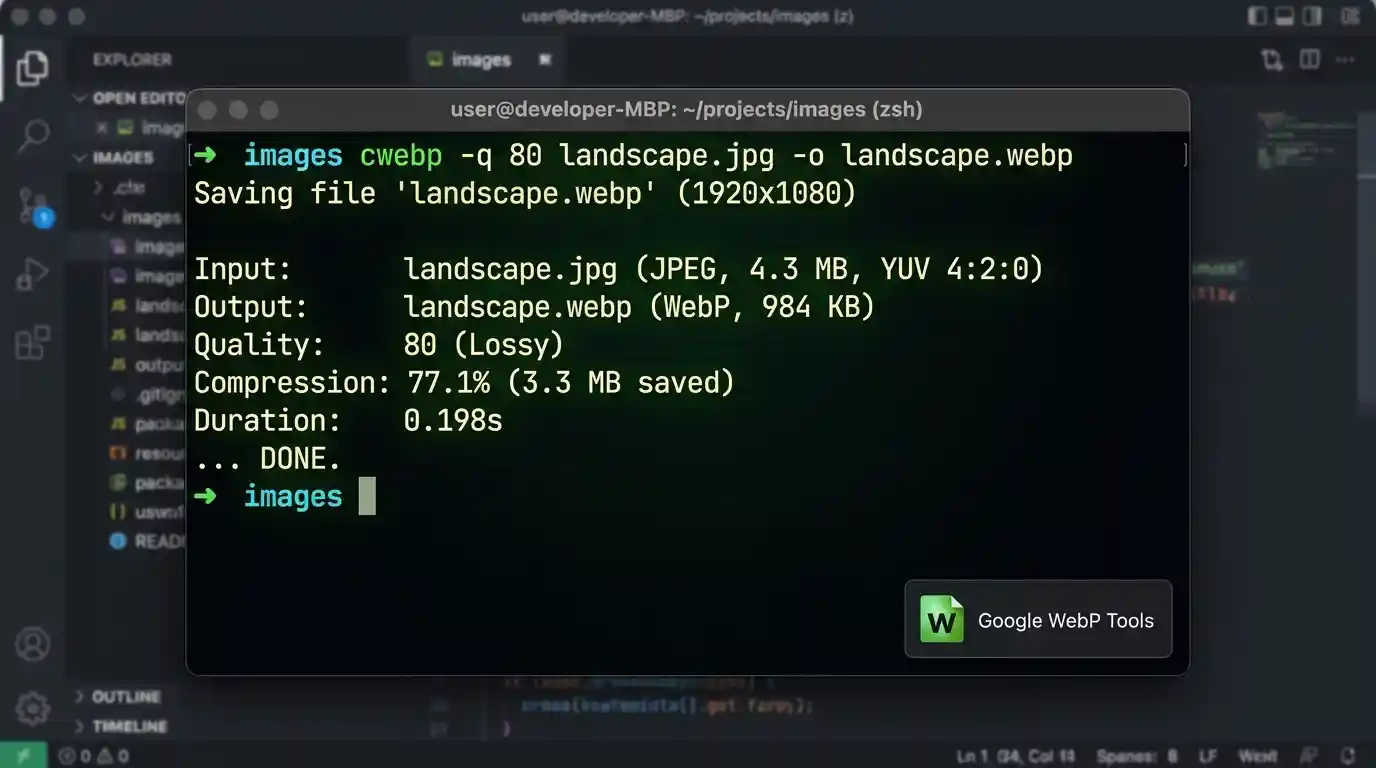
For developers and power users, Google’s official cwebp encoder is the most precise and automatable method available.
Installing cwebp
On Ubuntu/Debian:
bash
sudo apt-get install webp
On macOS (Homebrew):
bash
brew install webp
On Windows: Download the precompiled binary from Google’s WebP developer page and add it to your system PATH.
Basic cwebp Usage
bash
cwebp input.jpg -o output.webp
Advanced cwebp Options
bash
# Set quality (0-100, default 75)
cwebp -q 80 input.png -o output.webp
# Lossless conversion
cwebp -lossless input.png -o output.webp
# Resize during conversion
cwebp -resize 800 0 input.jpg -o output.webp
# Multithreaded encoding (faster on multi-core CPUs)
cwebp -mt -q 85 input.jpg -o output.webp
Decoding WebP Back to PNG
bash
dwebp input.webp -o output.png
How to Batch Convert Images to WebP
Converting one image at a time is impractical for large projects. Batch conversion is essential for e-commerce stores, blogs, and media-heavy platforms.
Batch Convert Using Bash (Linux/macOS)
bash
for file in *.jpg; do
cwebp -q 80 "$file" -o "${file%.jpg}.webp"
done
This loop processes every .jpg in the current folder and outputs a corresponding .webp file.
Batch Convert Using PowerShell (Windows)
powershell
Get-ChildItem -Filter *.png | ForEach-Object {

  cwebp -q 80 $_.FullName -o ($_.BaseName + ".webp")

}
Batch Convert Using XnConvert (GUI Tool)
XnConvert is a free, cross-platform desktop tool designed for batch image processing:
- Open XnConvert and add your source images or a folder
- Go to the Output tab
- Set Format to WebP
- Configure quality and other settings
- Click Convert
XnConvert supports over 500 input formats and is ideal for non-technical users who need bulk conversion.
How to Convert Images to WebP in WordPress
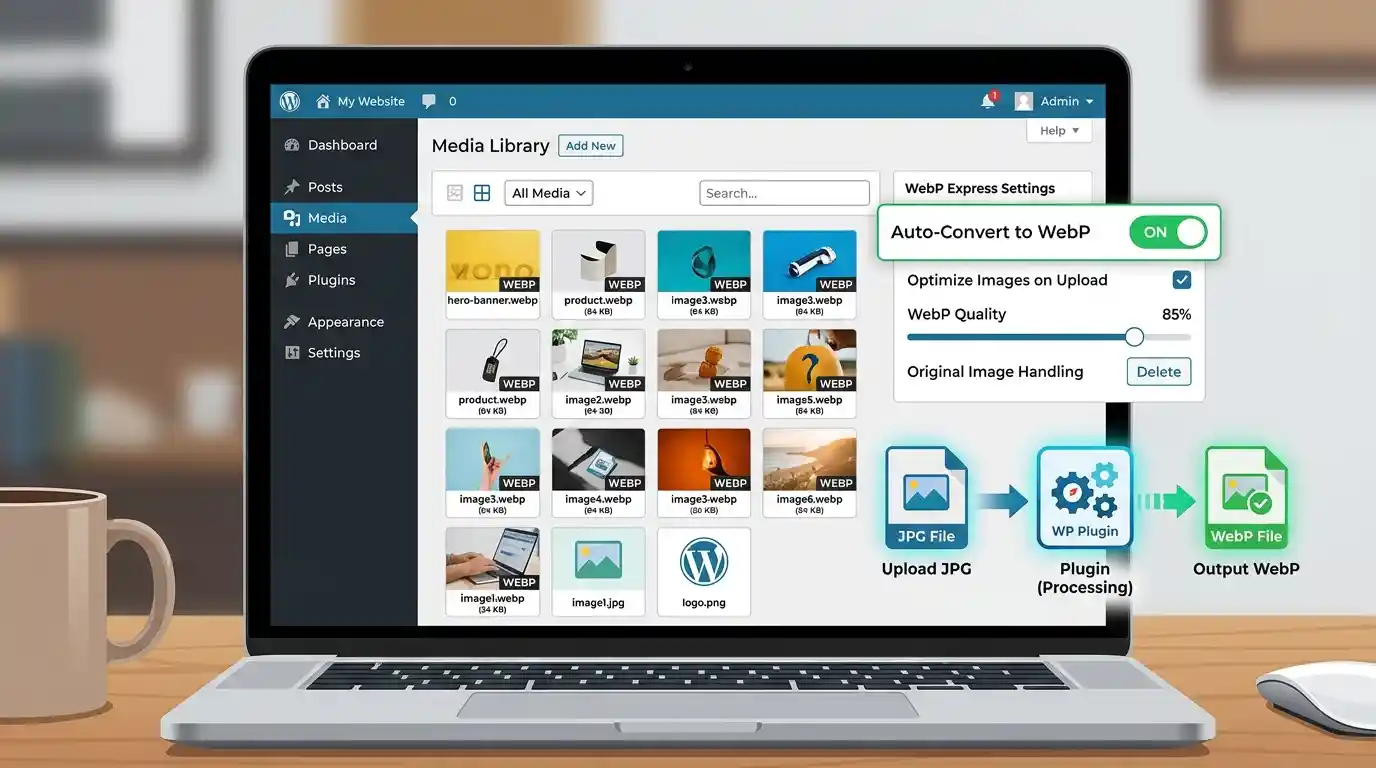
WordPress 5.8 and later offers native WebP support, meaning you can upload .webp files directly to the Media Library. But the more impactful approach is automatic server-side conversion.
Method 1: Use an Image Optimization Plugin
Plugins that auto-convert uploaded images to WebP include:
- Imagify — converts on upload, serves WebP via <picture> tags or .htaccess rewrite rules
- ShortPixel — lossy, glossy, and lossless modes; CDN delivery available
- Smush — WebP conversion with lazy loading integration
- EWWW Image Optimizer — supports local and cloud-based conversion
Method 2: Server-Level Conversion via .htaccess (Apache)
If your server has the mod_rewrite and mod_headers modules enabled, you can serve WebP versions automatically:
apache
<IfModule mod_rewrite.c>

  RewriteEngine On

  RewriteCond %{HTTP_ACCEPT} image/webp

  RewriteCond %{REQUEST_FILENAME} (.*)\.(jpe?g|png)$

  RewriteCond %{REQUEST_FILENAME}.webp -f

  RewriteRule ^ %{REQUEST_FILENAME}.webp [L,T=image/webp]

</IfModule>
This rule detects if the browser supports WebP (via the Accept header) and transparently serves the .webp version if it exists.
Method 3: CDN-Based Conversion
CDNs like Cloudflare (with Polish enabled), BunnyCDN, and KeyCDN can convert and cache WebP images at the edge automatically — no plugin or server configuration needed.
How to Convert Images to WebP Using Code
Python (Pillow Library)
python
from PIL import Image


img = Image.open("input.jpg")

img.save("output.webp", "webp", quality=85)


# Lossless

img.save("output_lossless.webp", "webp", lossless=True)
For batch processing in Python:
import os

from PIL import Image


input_folder = "images/"

output_folder = "webp_output/"

os.makedirs(output_folder, exist_ok=True)
for filename in os.listdir(input_folder):
    if filename.lower().endswith((".jpg", ".jpeg", ".png")):

        img = Image.open(os.path.join(input_folder, filename))

        base = os.path.splitext(filename)[0]

        img.save(os.path.join(output_folder, base + ".webp"), "webp", quality=82)
JavaScript (Node.js with Sharp)
const sharp = require('sharp');


sharp('input.jpg')

  .webp({ quality: 80 })

  .toFile('output.webp', (err, info) => {

    if (err) throw err;

    console.log(info);

  });
Sharp is one of the fastest Node.js image processing libraries, using libvips under the hood.
PHP (using GD or Imagick)
// Using GD
$image = imagecreatefromjpeg('input.jpg');

imagewebp($image, 'output.webp', 80);

imagedestroy($image);
// Using Imagick
$imagick = new Imagick('input.png');

$imagick->setImageFormat('webp');

$imagick->setImageCompressionQuality(85);

$imagick->writeImage('output.webp');
WebP Conversion Best Practices: Quality, Compression & Settings
Choosing the Right Quality Setting
| Use Case | Recommended Quality |
| Product photos (e-commerce) | 80–85 |
| Blog/editorial photography | 75–82 |
| Thumbnails and previews | 65–75 |
| Logos / UI elements | Lossless |
| Hero/banner images | 85–90 |
Preserve Alpha Transparency
When converting PNGs with transparent backgrounds (logos, icons, overlays), always use lossless WebP or ensure your lossy encoder preserves the alpha channel. Failing to do this results in black or white backgrounds replacing transparent areas.
Metadata Handling
Strip unnecessary EXIF metadata during conversion to further reduce file size. Most tools offer a “strip metadata” option. However, retain ICC color profiles if color accuracy is critical (especially for photography and print-adjacent workflows).
Avoid Double Compression
Never convert an already-compressed JPEG to WebP at low quality. Each re-encoding step introduces additional artifacts. Always work from the highest quality source file available (RAW or uncompressed TIFF is ideal).
Browser Support and Fallback Strategies for WebP
WebP is now supported by all major browsers, including Chrome, Firefox, Safari (since version 14), Edge, and Opera — covering over 97% of global users as of 2024–2025.
Using the <picture> Element for Fallback
<picture>

  <source srcset="image.webp" type="image/webp">

  <img src="image.jpg" alt="Description of image">

</picture>
This HTML5 pattern tells supporting browsers to load the .webp version while falling back to .jpg for any browser that does not support WebP — ensuring universal compatibility with zero visual difference.
CSS Background Image Fallback
Use the Modernizr library or feature detection to apply WebP backgrounds conditionally:
/* For browsers with WebP support (class added by Modernizr) */

.webp .hero {

  background-image: url('hero.webp');

}


/* Fallback */

.no-webp .hero {

  background-image: url('hero.jpg');

}
FAQs About Converting Images to WebP
Q: Does converting to WebP cause quality loss? Lossy WebP conversion does introduce minor quality reduction, similar to JPEG. At quality settings of 80+, the difference is imperceptible to most viewers. Lossless WebP is pixel-perfect.
Q: Can I convert WebP back to JPG or PNG? Yes. Tools like cwebp’s companion dwebp, GIMP, Photoshop, and online converters can decode WebP back to standard formats.
Q: Is WebP always smaller than JPEG? In the vast majority of cases, yes. However, very small or simple images may not show significant size differences.
Q: Should I delete original images after converting to WebP? No. Always retain originals. Browser support, use cases, and formats evolve — having the source file ensures you can re-process images in the future.
Q: Does WebP support animation? Yes. Animated WebP is a direct replacement for GIF and offers dramatically smaller file sizes for the same animation.