Summary
Learning how to Batch Compress Images is one of the fastest ways to reduce website load time, improve user experience, and prepare large image collections for web publishing, email, ecommerce listings, social media, and cloud storage. Instead of compressing one image at a time, batch image compression lets you optimize dozens or hundreds of files together while keeping visual quality under control. This guide explains what batch compression means, which image formats to use, how to avoid quality loss, and how to build a simple image optimization workflow that saves time without damaging your visuals.
Table of Content
- Why Learning How to Batch Compress Images Matters
- How to Batch Compress Images Step by Step
- Choosing the Right Image Format Before Compression
- Lossy vs Lossless Compression
- Best Settings for Batch Image Compression
- Common Batch Compression Mistakes to Avoid
- Image SEO Tips After Compression
- Suggested Image Prompts for the Article
- Conclusion
- FAQs
Why Learning How to Batch Compress Images Matters
Images are often the heaviest assets on a web page. A single large product photo, blog graphic, banner, or portfolio image can add several megabytes to a page. When a website contains many unoptimized visuals, the result is slower loading, higher bandwidth usage, weaker Core Web Vitals, and a poorer browsing experience.
Batch image compression solves this problem by reducing the file size of multiple images at once. Instead of opening every JPG, PNG, WebP, or AVIF image individually, you upload or select a group of files, apply compression settings, and download optimized versions in one operation.
This is useful for bloggers, e-commerce store owners, photographers, designers, developers, SEO specialists, social media managers, and anyone who regularly works with image-heavy content.
What Batch Image Compression Means
Batch image compression is the process of compressing multiple image files together. The goal is to reduce file size while preserving acceptable visual quality.
For example, you may have:
- 100 product images for an online store
- 40 blog images for a content website
- 25 screenshots for a tutorial
- 300 portfolio images from a photoshoot
- 60 PNG graphics for a landing page
Compressing these images one by one wastes time. Batch compression lets you process them together using the same quality level, maximum width, file format, naming convention, or output folder.
Why Image Compression Helps SEO
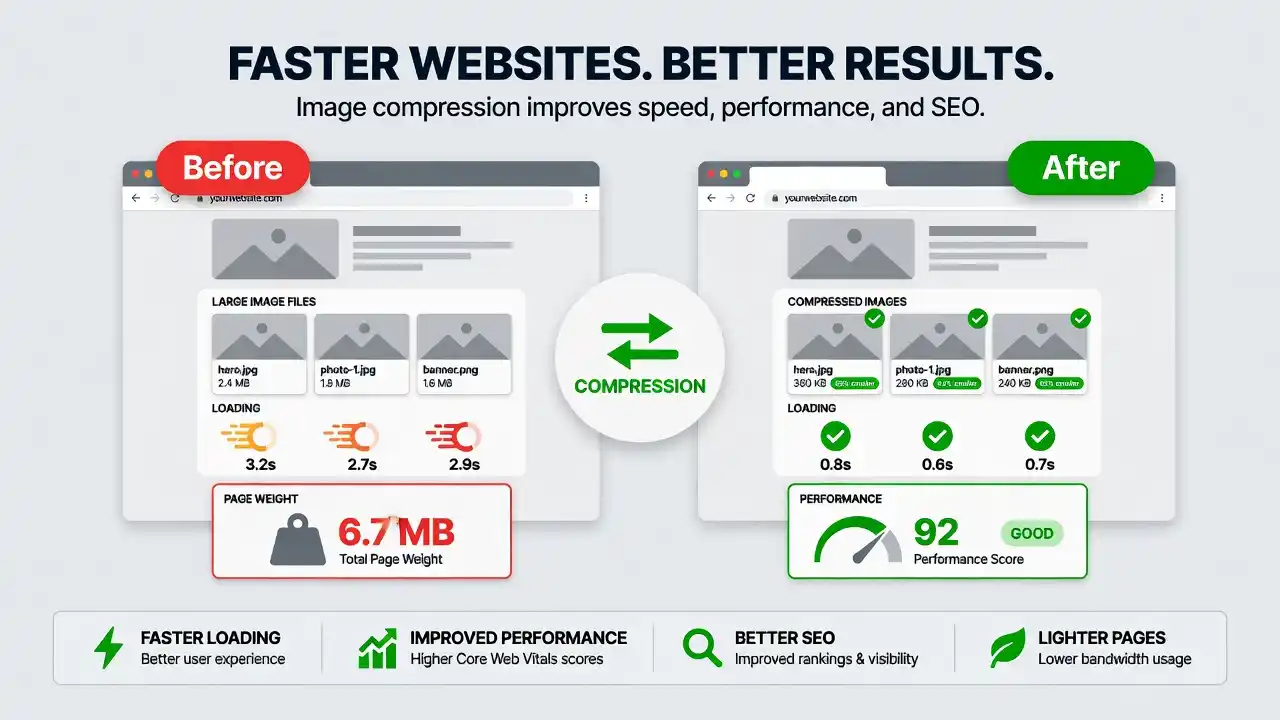
Search engines care about user experience. Fast-loading pages are easier for visitors to use, especially on mobile devices and slower connections. Compressed images can help improve performance signals such as Largest Contentful Paint, page load speed, and overall responsiveness.
Image compression also improves crawl efficiency. When pages load faster and use smaller media assets, search engines can access content more efficiently. For website owners, this can support better engagement, lower bounce rates, and stronger technical SEO.
Google’s own PageSpeed guidance explains that optimized images can reduce file size without significantly affecting visual quality. For a deeper technical reference, see Google’s PageSpeed Insights image optimization guidance.
How to Batch Compress Images Step by Step
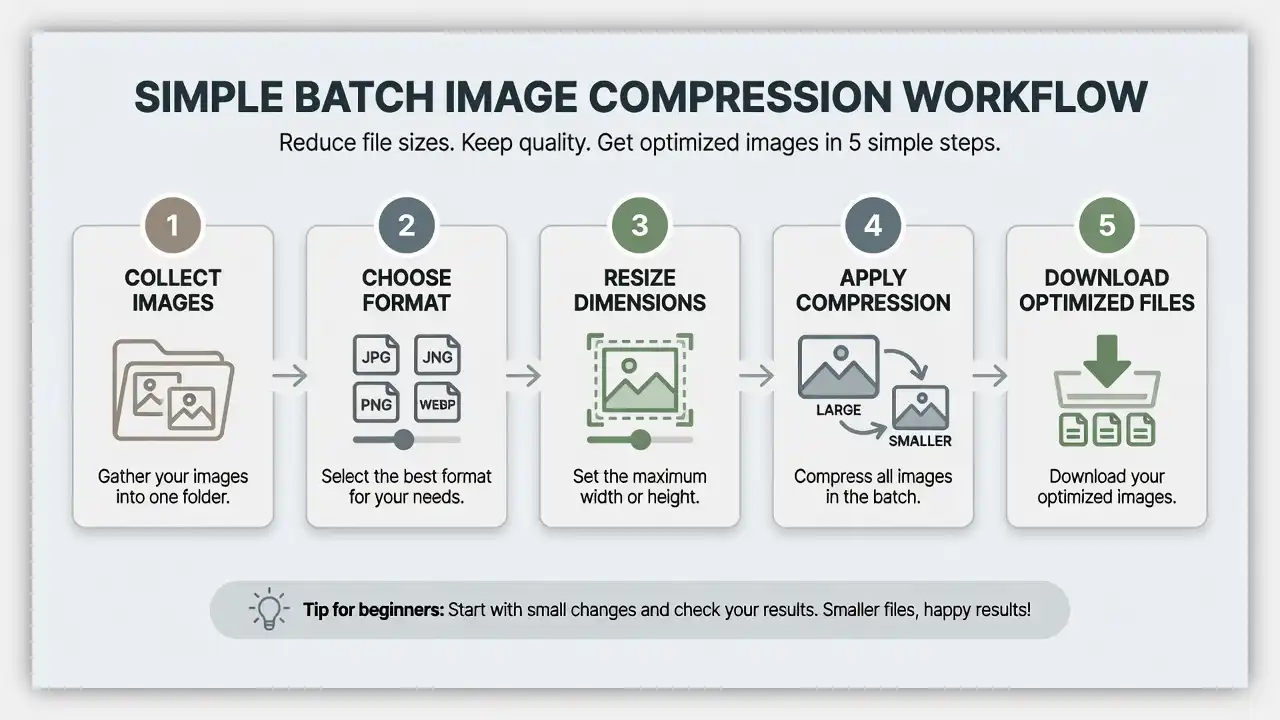
Batch compression is simple when you follow a consistent workflow. The exact steps may vary depending on whether you use an online image compressor, desktop software, a WordPress plugin, a command-line tool, or a design application. Still, the core process is usually the same.
Step 1: Collect All Images in One Folder
Start by placing all images you want to compress in one folder. This helps you avoid missing files or mixing optimized and unoptimized versions.
Create a folder structure like this:
Original Images
Compressed Images
WebP Versions
Backup
Always keep your original images. Compression can reduce quality, remove metadata, or resize dimensions. If something goes wrong, the backup lets you start again.
Step 2: Remove Images You Do Not Need
Before compressing anything, review your files. Delete duplicates, blurry images, unused screenshots, outdated graphics, and unnecessary variations.
This matters because the best optimization is not compressing a useless image. It is removing it entirely.
A clean folder means faster compression, smaller storage use, and fewer files to manage later.
Step 3: Choose the Best Output Format
Not every image should use the same format. For most websites, JPEG, PNG, WebP, and AVIF are the most common choices.
JPEG works well for photographs, product images, travel photos, food images, and lifestyle visuals. PNG is better for transparent backgrounds, interface graphics, icons, and screenshots with sharp text. WebP is a strong modern format for websites because it usually creates smaller files than JPEG and PNG while keeping good quality. AVIF can create even smaller files, but compatibility and workflow support should be checked before using it everywhere.
For most users, WebP is a practical choice for batch web compression. JPEG remains useful when maximum compatibility is required.
Step 4: Set Compression Quality
Most compression tools let you choose a quality level, often from 1 to 100.
A good starting point is:
- JPEG: 70 to 85 quality
- WebP: 70 to 85 quality
- PNG: lossless compression or smart palette reduction
- AVIF: 45 to 65 quality, depending on the tool
Avoid setting quality too low. Extremely aggressive compression can create visible artifacts, blurry edges, color banding, and poor-looking images. The goal is not the smallest possible file. The goal is the best balance between image quality and file size.
Step 5: Resize Oversized Images
Compression reduces file size, but resizing often creates even bigger savings.
If your website content area is 900 pixels wide, you usually do not need to upload a 5000-pixel-wide image. Large dimensions increase file size and force browsers to download unnecessary data.
For blog posts, a common width range is 1200 to 1600 pixels. For thumbnails, 300 to 600 pixels may be enough. For full-width hero images, 1600 to 2400 pixels may be suitable depending on the design.
Batch resizing and batch compression work well together. Resize first, then compress.
Step 6: Compress Images in Bulk
Now upload or select all images in your compression tool. You can use online tools, desktop apps, CMS plugins, or automated scripts.
For quick browser-based image tasks, you can use Free online Image Tools to handle image-related work without installing software.
When compressing a batch, check whether the tool supports:
- Multiple file uploads
- Drag-and-drop processing
- ZIP download
- Format conversion
- Resize options
- Quality control
- Metadata removal
- WebP conversion
- PNG compression
- Bulk export
A good batch compression tool should make the process fast, predictable, and simple.
Step 7: Compare Before and After Results
After compression, check both file size and image quality. Do not rely only on the percentage saved.
Open a few compressed images at full size and compare them with the originals. Pay close attention to faces, text, logos, shadows, gradients, product edges, and background details.
If images look too soft, increase the quality level. If they still look excellent, you may be able to reduce the quality slightly and save more space.
Step 8: Rename Images for SEO
After compression, rename files with descriptive, readable names.
Instead of:
IMG_4938.jpg
Use:
batch-compressed-product-image.jpg
This helps with file organization and can support image SEO. Use lowercase words, hyphens between terms, and relevant descriptions. Avoid keyword stuffing.
Step 9: Add Alt Text Before Publishing
Compressed images still need meaningful alt text. Alt text helps search engines understand image content and improves accessibility for users who rely on screen readers.
For a deeper explanation, read How Alt Text Helps SEO: A Complete Guide.
Good alt text should describe the image naturally. It should not be a list of keywords.
Example:
Bad alt text: image compression batch compress images SEO tool fast image
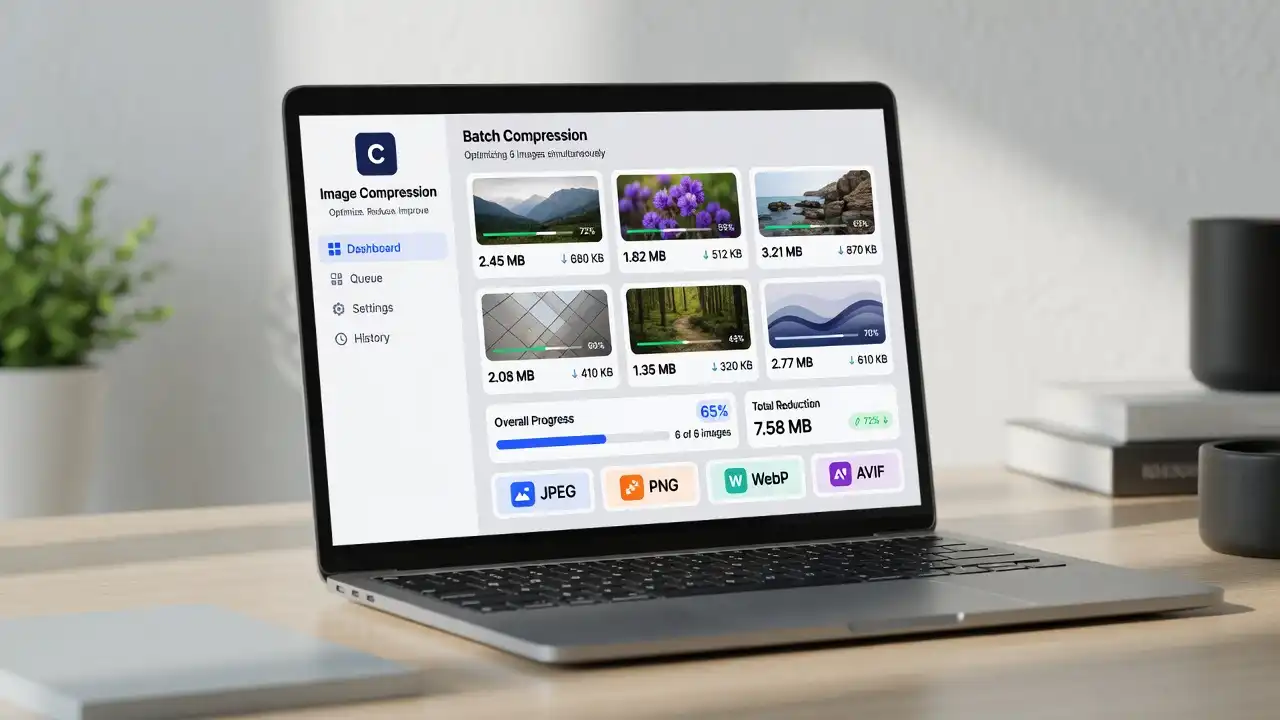
Good alt text: Dashboard showing multiple images being compressed in bulk
Choosing the Right Image Format Before Compression
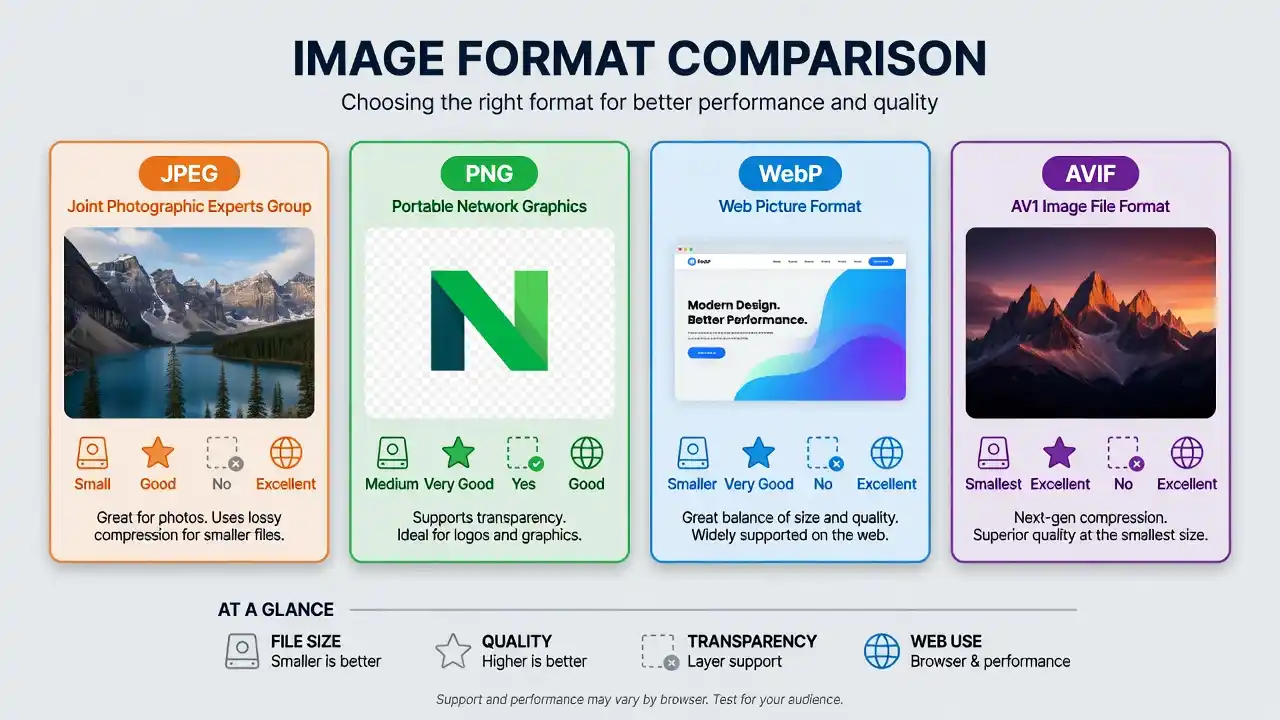
The image format you choose affects file size, quality, transparency, browser support, and visual sharpness. Before batch compressing images, decide which format fits each type of visual.
JPEG for Photos
JPEG is best for complex photographs. It handles color-rich images well and produces smaller files than PNG for most photos.
Use JPEG for:
- Product photos
- Blog images
- Portraits
- Travel photos
- Food photography
- Real estate images
- Event photos
JPEG uses lossy compression, which means some image data is permanently removed. At reasonable quality settings, the difference is usually hard to notice.
PNG for Transparency and Sharp Graphics
PNG is best when you need transparency or sharp details. It is commonly used for logos, icons, UI screenshots, and graphics with text.
Use PNG for:
- Transparent logos
- Interface screenshots
- Flat illustrations
- Diagrams
- Icons
- Images with sharp lines
PNG files can become large, especially for photos. Avoid using PNG for large photographic images unless transparency is required.
WebP for Modern Website Optimization
WebP is often a strong choice for websites because it supports both lossy and lossless compression. It can also support transparency, making it flexible for many use cases.
Use WebP for:
- Blog images
- E-commerce images
- Website banners
- Thumbnails
- Landing page visuals
- Mobile-friendly image delivery
Many modern websites convert JPEG and PNG files to WebP to reduce page weight.
AVIF for Advanced Compression
AVIF can produce very small files with impressive quality, especially for photographic images. However, workflows, editing tools, and compatibility requirements should be considered before using AVIF as your main image format.
Use AVIF when:
- Your website supports modern image delivery
- You have fallback formats
- You want maximum compression
- Your CMS or CDN handles AVIF well
For many site owners, WebP is currently easier to manage than AVIF.
Lossy vs Lossless Compression
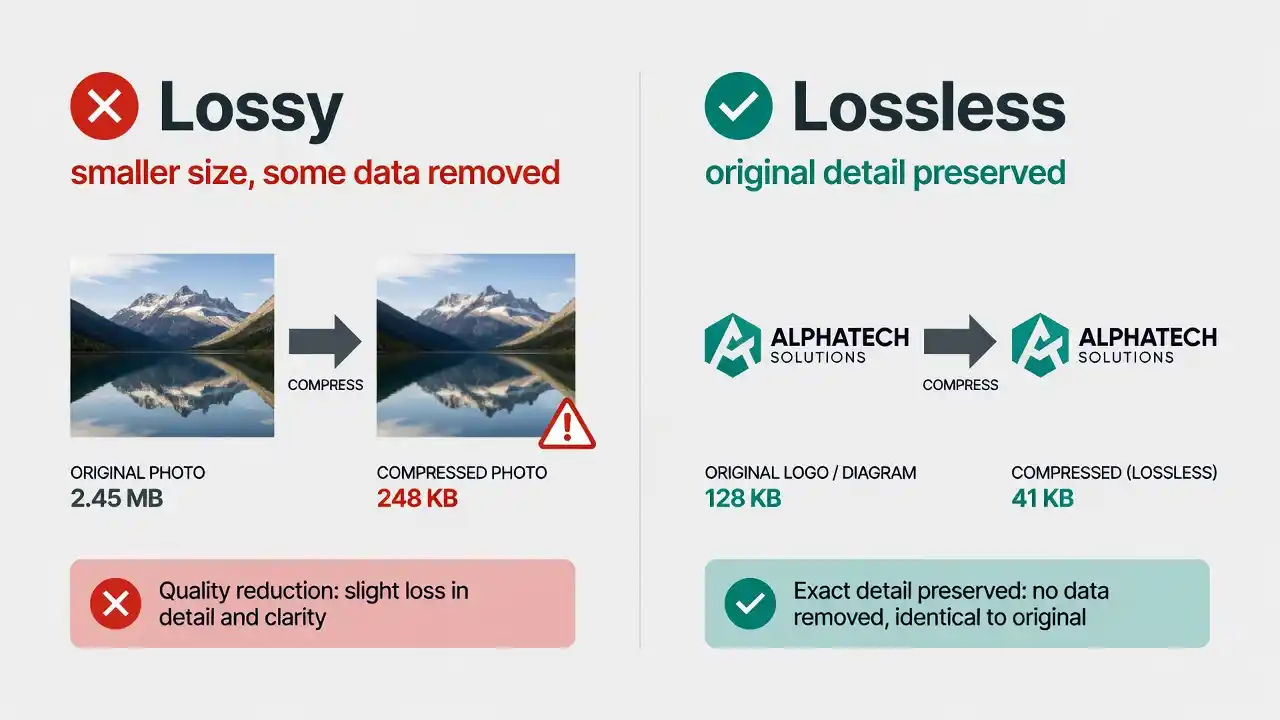
Understanding lossy and lossless compression helps you choose the right settings for batch image optimization.
Lossy Compression
Lossy compression reduces file size by permanently removing some image data. This can create major file savings, but quality may drop if compression is too aggressive.
Lossy compression works well for:
- JPEG photos
- WebP photos
- Blog graphics
- E-commerce images
- Social media visuals
The key is to use a balanced quality setting. You want smaller files without obvious damage.
Lossless Compression
Lossless compression reduces file size without permanently removing image data. The image stays visually and technically intact, but file savings are usually smaller than those of lossy compression.
Lossless compression works well for:
- PNG graphics
- Logos
- Screenshots
- Technical diagrams
- Images requiring exact detail
If visual precision matters, start with lossless compression.
Best Settings for Batch Image Compression
There is no universal setting that works for every image. However, the following practical settings are a strong starting point.
Blog Images
For blog posts, resize images to around 1200 pixels wide and use WebP or JPEG at 75 to 85 quality. This usually provides a good balance between sharpness and file size.
Recommended settings:
- Format: WebP or JPEG
- Width: 1200 to 1600 pixels
- Quality: 75 to 85
- Metadata: remove unless needed
- Target size: ideally under 200 KB when possible
E-commerce Product Images
Product images must remain clear because buyers need to inspect details. Over-compression can reduce trust and hurt conversions.
Recommended settings:
- Format: WebP or JPEG
- Width: 1200 to 2000 pixels
- Quality: 80 to 90
- Background: preserve clean edges
- Zoom images: keep higher resolution when needed
Screenshots and Tutorials
Screenshots often contain small text, interface details, buttons, and icons. Heavy lossy compression can make text hard to read.
Recommended settings:
- Format: PNG or WebP
- Width: match display size
- Quality: 80 to 90 for WebP
- Use PNG for text-heavy screenshots
- Avoid extreme compression
Social Media Graphics
Social platforms often recompress uploaded images. Start with a clean, high-quality image to avoid double-compression damage.
Recommended settings:
- Format: JPEG or PNG
- Width: platform-specific dimensions
- Quality: 85 to 95
- Keep text sharp
- Avoid uploading already damaged images
Common Batch Compression Mistakes to Avoid
Batch compression saves time, but it can also create problems if you apply the wrong settings to every file.
Compressing Without Backups
Never overwrite original images unless you are completely sure. Keep a backup folder with the full-resolution originals. This protects you from accidental quality loss, bad resizing, wrong format conversion, or metadata removal.
Using One Setting for Every Image
Photos, logos, screenshots, and illustrations need different settings. A quality level that works for a product photo may damage a screenshot. A PNG setting that works for a logo may create huge files for photos.
Group similar images before batch compression.
Ignoring Image Dimensions
A compressed 5000-pixel image can still be too large for the web. Resize images based on how they will be displayed. Compression and resizing should work together.
Removing Important Metadata Accidentally
Many tools remove EXIF metadata to reduce file size. This is usually fine for web images, but photographers may need to preserve copyright, camera, or location data.
Check metadata settings before compressing professional images.
Over-Compressing for Small File Size
The smallest image is not always the best image. If compression creates blurry faces, noisy backgrounds, broken gradients, or pixelated product edges, the image may hurt user trust.
Quality matters, especially for e-commerce, portfolios, food blogs, real estate, and professional services.
Image SEO Tips After Compression
Batch compression is only one part of image optimization. After compressing images, prepare them properly for search engines and users.
Use Descriptive File Names
A file name like compressed-running-shoes-blue.jpg is more helpful than DSC9981.jpg. Use simple, descriptive words that explain the image.
Add Natural Alt Text
Alt text should describe what appears in the image. Include a relevant keyword only when it fits naturally.
Example:
A woman using a laptop to batch compress images for a website
This is better than forcing the same keyword into every image.
Use Responsive Images
Responsive images help browsers load the best image size for each device. This prevents mobile users from downloading unnecessarily large desktop images.
Developers can use srcset and sizes attributes, while many CMS platforms and image CDNs handle responsive image delivery automatically.
Use Lazy Loading
Lazy loading delays off-screen image loading until the user scrolls near them. This can improve initial page speed, especially for long blog posts and ecommerce category pages.
Test Page Speed After Uploading
After publishing compressed images, test the page with performance tools. Check whether images are properly sized, compressed, cached, and served in modern formats.
Conclusion
Batch image compression is a practical way to improve website performance, organize large image libraries, and prepare visuals for publishing at scale. When done correctly, it reduces file size without making images look poor.
The best workflow is simple: keep backups, group similar images, choose the right format, resize oversized files, apply balanced compression, review quality, and optimize filenames and alt text before publishing.
For most websites, WebP and JPEG are strong everyday choices. PNG remains important for transparency and sharp graphics, while AVIF can be useful for advanced optimization. The right choice depends on the image type, website setup, browser support, and quality requirements.
If you regularly upload blog graphics, product photos, screenshots, or marketing visuals, batch compression should become part of your publishing process. It saves time, improves page speed, supports SEO, and gives users a smoother experience.
FAQs
1. What is the easiest way to batch compress images?
The easiest way is to use an online image compression tool that supports multiple uploads. Upload your images, choose compression settings, process them together, and download the optimized files in a ZIP folder.
2. Does batch image compression reduce quality?
It can reduce quality if you use lossy compression or very aggressive settings. However, moderate compression usually keeps images visually clear while reducing file size significantly.
3. What is the best format for compressed website images?
WebP is often one of the best formats for website images because it provides strong compression and good visual quality. JPEG is still useful for compatibility, while PNG is better for transparent graphics and screenshots.
4. Should I resize images before compressing them?
Yes. Resizing oversized images before compression can greatly reduce file size. There is usually no need to upload a 5000-pixel-wide image if it displays at 1200 pixels on your website.
5. Is lossless compression better than lossy compression?
Lossless compression is better when you need to preserve exact detail, such as logos or screenshots. Lossy compression is better when you want smaller files for photos and web images.
6. Can I batch compress images for WordPress?
Yes. You can batch compress images before uploading them to WordPress, or you can use an image optimization plugin that compresses images inside your media library.
7. How much can image compression reduce file size?
Image compression can reduce file size by 20% to 80% or more, depending on the original file, format, dimensions, and compression settings.
8. Should I remove EXIF metadata during compression?
For most website images, removing EXIF metadata is fine and can reduce file size. However, photographers or businesses that need copyright, camera, or location data may want to preserve it.
9. Can compressed images improve SEO?
Yes. Compressed images can improve page speed, user experience, and technical SEO. They should also have descriptive file names, helpful alt text, and proper dimensions.
10. How often should I compress images?
Compress images every time before publishing them online. If your website already has many large images, you should also audit and compress older media files.