Summary
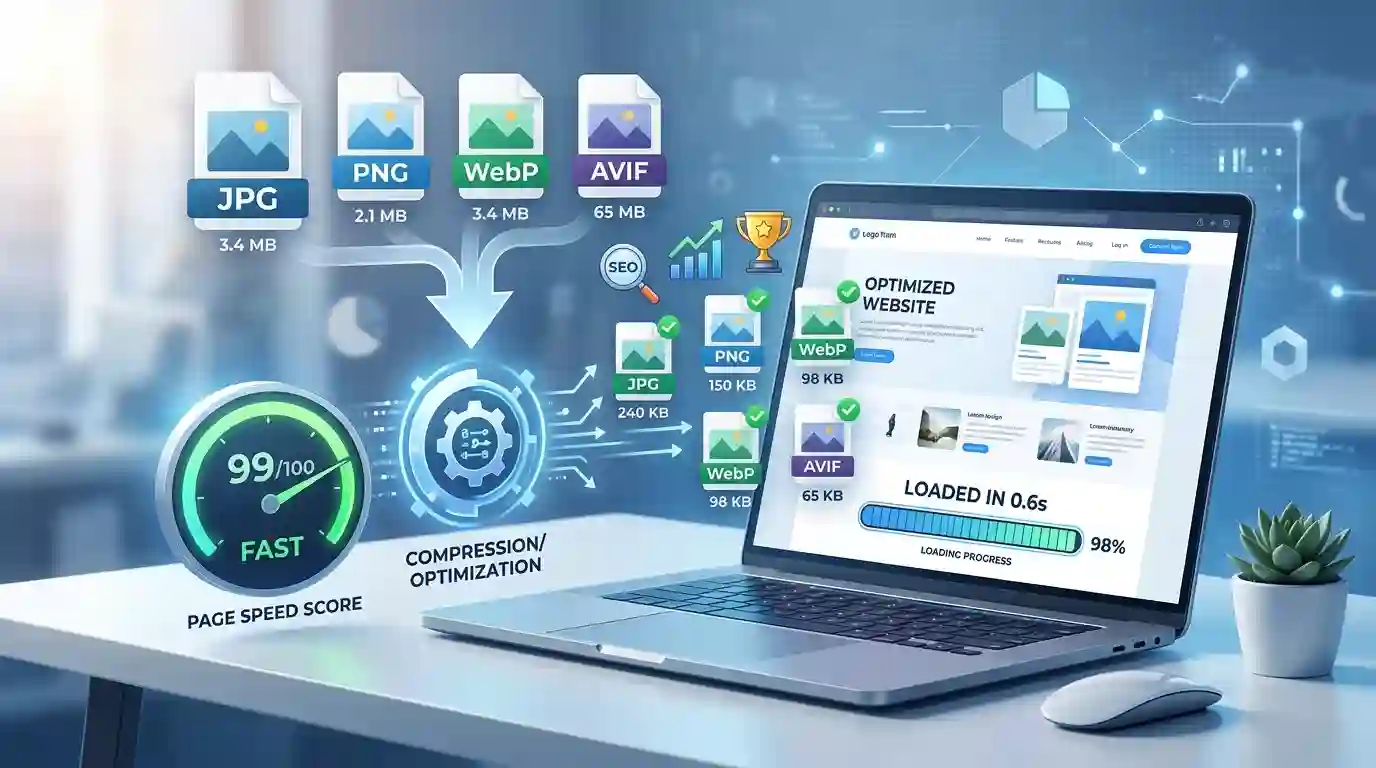
The Best Compression Level for Website Images is not a single universal number. It depends on image type, format, page purpose, visual quality needs, and loading speed goals. For most websites, JPEG images work well at 70–85% quality, WebP at 75–85%, and PNG should usually be optimized losslessly or converted to WebP when transparency and smaller file size are needed. The ideal approach is to reduce image file size as much as possible without creating visible blur, color banding, pixelation, or loss of brand quality.
Table of Contents
- What Is Image Compression?
- Why Image Compression Matters for Website Speed
- What Is the Best Compression Level for Website Images?
- Best Compression Level for Website Images by Format
- Lossy vs Lossless Compression
- Recommended Compression Settings for Different Website Images
- How Image Compression Affects SEO and Core Web Vitals
- Common Image Compression Mistakes
- Image Prompts for Helpful Blog Graphics
- Conclusion
- FAQs
What Is Image Compression?
Image compression is the process of reducing the file size of an image while keeping it visually acceptable for users. A smaller image file loads faster, uses less bandwidth, and improves the overall website experience. This is especially important for mobile visitors, slow internet connections, ecommerce websites, blogs, landing pages, portfolio websites, and media-heavy pages.
Compression works by removing unnecessary image data. Sometimes this data is invisible to the human eye, and sometimes it slightly affects the image’s sharpness, color, or detail. The goal is to find the right balance between image quality and file size.
For example, a 2 MB product image might look beautiful, but it can slow down a page. After smart compression, the same image might become 180 KB or 250 KB while still looking clean and professional. That is why choosing the right compression level is so important.
Website image optimization usually includes:
- Compressing images
- Resizing dimensions
- Choosing the right file format
- Using responsive images
- Converting JPG or PNG to WebP
- Removing unnecessary metadata
- Serving images through caching or CDN systems
Google’s image performance guidance explains that modern formats such as WebP and AVIF can reduce file size and improve loading performance, which can also help Largest Contentful Paint, commonly known as LCP. Google web.dev image performance guide
Why Image Compression Matters for Website Speed
Images are often among the largest assets on a webpage. A page may contain a featured image, background image, product thumbnails, icons, banners, screenshots, logos, and gallery photos. If these images are not compressed properly, the browser has to download more data before the page becomes usable.
A slow-loading page can affect:
User Experience
Visitors expect pages to load quickly. If your homepage, blog post, or product page takes too long, users may leave before reading your content or buying your product. Compressed images help your website feel smooth, fast, and professional.
SEO Performance
Page speed is part of the overall user experience. Search engines want to send users to pages that load well, especially on mobile devices. Large images can hurt page performance, increase bounce rate, and reduce engagement.
Conversion Rate
For ecommerce and service websites, image compression can directly affect sales and leads. A product image must look clear, but it should not be so heavy that it slows down the checkout journey. The best compression level helps preserve visual trust while improving speed.
Mobile Performance
Many users browse from mobile devices. Mobile networks can be slower or less stable than desktop broadband. Proper image compression makes your website lighter and easier to access for mobile visitors.
What Is the Best Compression Level for Website Images?
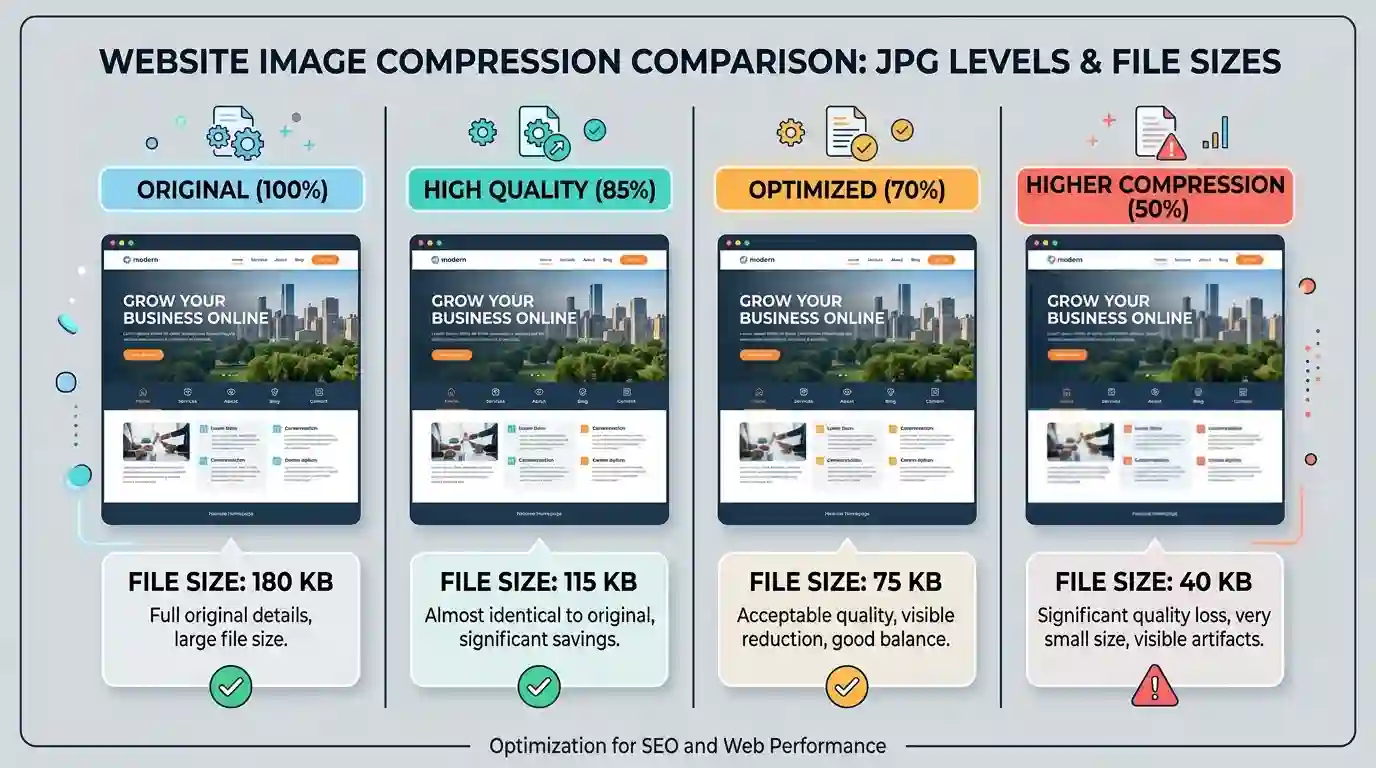
The best compression level is the point where the image file size is reduced significantly, but the image still looks sharp and natural on the page.
For most website images, a good starting point is:
JPEG: 70–85% Quality
JPEG is best for photographs, blog images, hero images, and product photos without transparency. A compression level around 75–85% usually gives a good balance between quality and file size. For background images or less important visuals, you can often go lower, around 60–70%.
WebP: 75–85% Quality
WebP is one of the best formats for modern website images. It usually creates smaller files than JPEG and PNG while keeping good visual quality. For most websites, WebP quality between 75 and 85 works very well. If you are optimizing product photos, keep the quality closer to 80–85. For blog thumbnails, 70–80 may be enough.
You can use an Optimize images for web tool to convert JPG images to WebP and reduce file size for faster loading.
PNG: Lossless or Convert to WebP
PNG is commonly used for graphics, transparent images, icons, screenshots, and logos. PNG compression is usually lossless, meaning it reduces file size without visibly changing the image. However, PNG files can still be heavy. If you do not need exact PNG output, converting PNG to WebP can often reduce file size.
AVIF: 50–75% Quality
AVIF can create very small image files with strong visual quality. However, encoding can be slower, and workflow support may vary depending on your CMS, plugin, or image tool. For websites that support AVIF delivery, a quality range of 50–75 is often suitable.
SVG: No Traditional Compression Level
SVG is best for simple logos, line icons, vector illustrations, and UI graphics. Instead of choosing a compression level, you should minify the SVG code, remove unnecessary metadata, and avoid overly complex paths.
Best Compression Level for Website Images by Format
Choosing the best compression level depends on the format. Here is a practical guide.
Best JPEG Compression Level
JPEG uses lossy compression. This means some image data is permanently removed to reduce file size. The more you compress, the smaller the file becomes, but the more quality you lose.
Recommended JPEG quality levels:
- 85–90: High-quality product images, portfolio images, photography websites
- 75–85: Blog images, hero banners, featured images, service pages
- 60–75: Background images, thumbnails, decorative visuals
- Below 60: Only for low-priority images where quality is not important
For most websites, 80% JPEG quality is a safe starting point. It reduces file size while keeping the image clean.
Best WebP Compression Level
WebP is ideal for website performance because it supports both lossy and lossless compression. It also supports transparency, which makes it a flexible alternative to JPEG and PNG.
Recommended WebP quality levels:
- 85–90: Premium product photos, professional portfolios
- 75–85: Blog posts, landing pages, homepage sections
- 65–75: Thumbnails, previews, background images
- Lossless WebP: Logos, icons, transparent graphics, screenshots with text
For most websites, WebP at 80% quality is an excellent default setting.
Best PNG Compression Level
PNG is usually used when image accuracy matters. It is common for:
- Logos
- Screenshots
- Transparent images
- UI graphics
- Text-based graphics
- Infographics
PNG compression does not work the same way as JPEG quality. Instead of choosing 70% or 80%, PNG tools remove extra data and optimize color palettes. For PNG files, use strong lossless compression when possible. If the image does not require PNG, convert it to WebP.
Best AVIF Compression Level
AVIF can provide very high compression efficiency. It is useful for high-performance websites, image-heavy blogs, and modern web applications.
Recommended AVIF quality levels:
- 65–75: High-quality visual content
- 50–65: Standard blog and marketing images
- 40–50: Backgrounds, thumbnails, and low-priority images
AVIF can be powerful, but you should always test browser support, visual quality, and CMS compatibility.
Lossy vs Lossless Compression
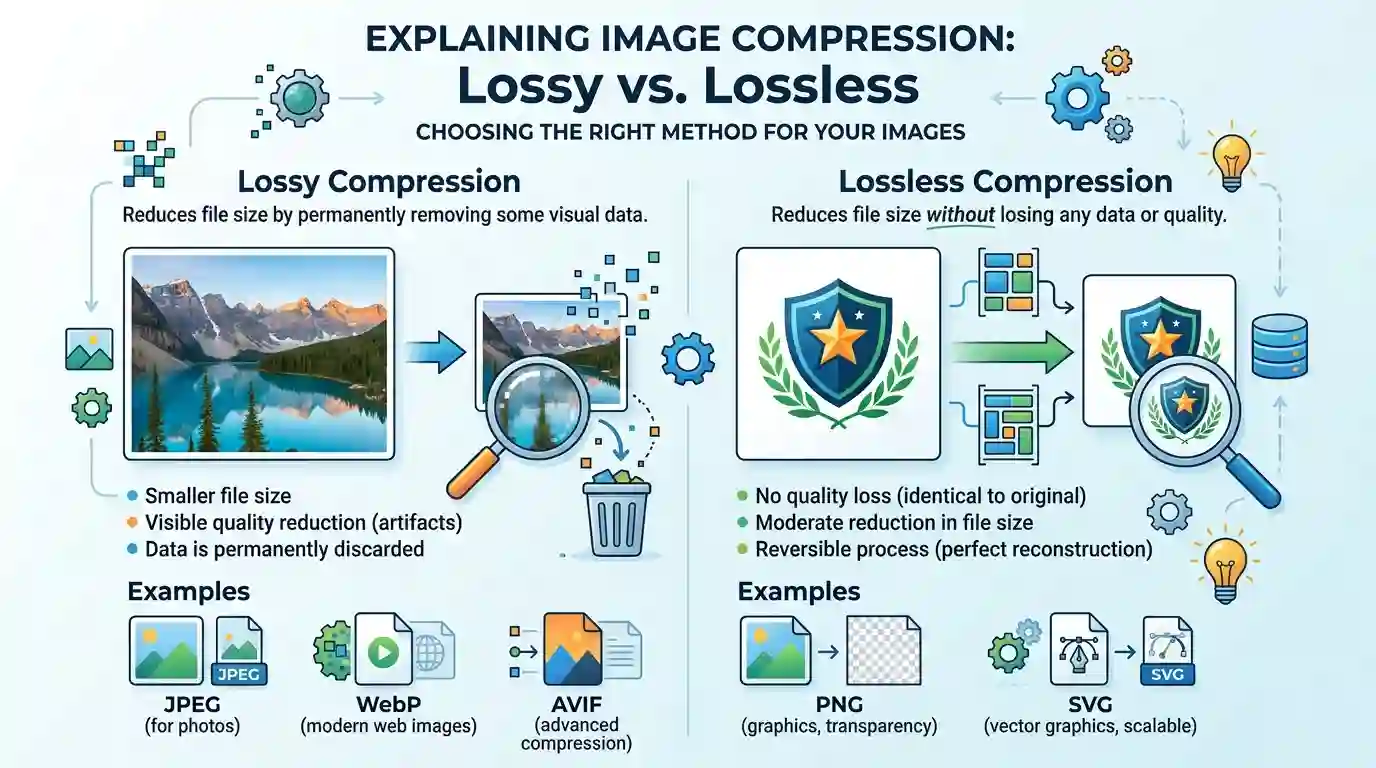
To choose the best compression level for website images, you must understand the difference between lossy and lossless compression.
Lossy Compression
Lossy compression removes some image information permanently. It is best when you want a smaller file size and can accept a small visual quality reduction.
Best for:
- Blog images
- Hero banners
- Product photos
- Background images
- Social media images
- Large photography files
Common lossy formats include JPEG, WebP, and AVIF.
Lossless Compression
Lossless compression reduces file size without removing visible image details. It keeps the original quality intact.
Best for:
- Logos
- Icons
- Screenshots
- Diagrams
- Transparent graphics
- Text-heavy images
Common lossless formats include PNG, SVG, GIF, and lossless WebP.
Which One Should You Use?
Use lossy compression for photographic images and lossless compression for brand assets, screenshots, icons, and graphics with text. If your image contains fine text, sharp edges, or transparent elements, do not over-compress it.
Recommended Compression Settings for Different Website Images
Different image types need different compression levels. A hero image should not be treated the same way as a small thumbnail.
Hero Images
Hero images are large and visible above the fold. They can strongly affect Largest Contentful Paint. Use WebP at 75–85% quality or JPEG at 75–85% quality. Resize the image to the actual display size and avoid uploading a 4000 px image if your layout only needs 1600 px.
Recommended setting:
- WebP: 80%
- JPEG: 80%
- Maximum width: 1600–1920 px for full-width desktop hero sections
Blog Featured Images
Blog featured images should be attractive but lightweight. A featured image usually appears at the top of the article and may also appear in previews.
Recommended setting:
- WebP: 75–85%
- JPEG: 75–80%
- Target file size: 100–250 KB when possible
Product Images
Product images require more quality because users need to inspect details before buying. Over-compression can make products look cheap or unclear.
Recommended setting:
- WebP: 80–90%
- JPEG: 80–90%
- Use zoom images separately if needed
- Keep thumbnails smaller and more compressed
Thumbnails
Thumbnails are small preview images. They do not need the same quality level as full-size images.
Recommended setting:
- WebP: 65–75%
- JPEG: 60–75%
- Resize to exact thumbnail dimensions
Background Images
Background images are often decorative. They can usually be compressed more aggressively because users do not inspect them closely.
Recommended setting:
- WebP: 60–75%
- JPEG: 60–70%
- Use blur, overlay, or gradient effects to hide minor compression loss
Screenshots
Screenshots often include text, UI elements, buttons, and sharp lines. If compressed too much, the text can become blurry.
Recommended setting:
- PNG lossless
- WebP lossless
- WebP lossy at 85–95% if file size is too large
Logos and Icons
Logos and icons should stay sharp. Use SVG whenever possible. If SVG is not available, use PNG or WebP lossless.
Recommended setting:
- SVG for vector logos
- PNG lossless for transparent raster logos
- WebP lossless for smaller files with transparency
How Image Compression Affects SEO and Core Web Vitals
Image compression supports SEO by improving speed, mobile usability, and user engagement. Search engines evaluate how users experience a page, and slow pages often perform worse than fast pages.
Largest Contentful Paint
Largest Contentful Paint measures how quickly the largest visible content element loads. On many pages, this element is a hero image or featured image. If the image is too heavy, LCP can become poor.
To improve LCP:
- Compress hero images
- Use WebP or AVIF
- Serve responsive image sizes
- Avoid lazy loading the main above-the-fold image
- Preload the most important hero image when appropriate
Cumulative Layout Shift
Compression itself does not directly fix layout shift, but image optimization should include width and height attributes. When the browser knows the image dimensions, it can reserve space before the image loads.
To reduce layout shift:
- Add width and height attributes
- Use CSS aspect-ratio
- Avoid replacing images after load
- Use properly sized placeholders
Mobile Speed
Compressed images reduce total page weight. This is important for mobile SEO because mobile users often face slower networks and smaller devices. Smaller image files help pages load faster and feel more responsive.
For a deeper guide on performance improvements, read this article on how to Make Images Load Faster.
Common Image Compression Mistakes
Many website owners compress images, but still make mistakes that hurt quality or performance.
Mistake 1: Uploading Huge Dimensions
A 5000 px image is unnecessary if your website displays it at 1200 px. Compression reduces file size, but resizing is just as important. Always resize images before uploading or use a tool that automatically creates responsive versions.
Mistake 2: Using PNG for Photos
PNG is not ideal for large photographs. It can create very heavy files. Use JPEG, WebP, or AVIF for photos.
Mistake 3: Over-Compressing Product Images
If product photos are too blurry, customers may lose trust. Use a higher quality setting for product images and test the final result on desktop and mobile.
Mistake 4: Ignoring WebP
WebP is widely supported by modern browsers and is one of the easiest ways to reduce file size. If your website still uses only JPG and PNG, converting images to WebP can improve performance.
Mistake 5: Compressing the Same Image Repeatedly
Repeated lossy compression can damage image quality. Always keep an original high-quality version, then export optimized versions from the original source.
Mistake 6: Forgetting Alt Text
Compression helps speed, but image SEO also needs descriptive alt text. Alt text helps search engines understand the image and improves accessibility for screen readers.
Mistake 7: Not Testing Visual Quality
The best compression level is not just a number. You must compare the compressed image with the original. Check skin tones, text clarity, product edges, gradients, shadows, and fine details.
Practical Workflow to Find the Best Compression Level
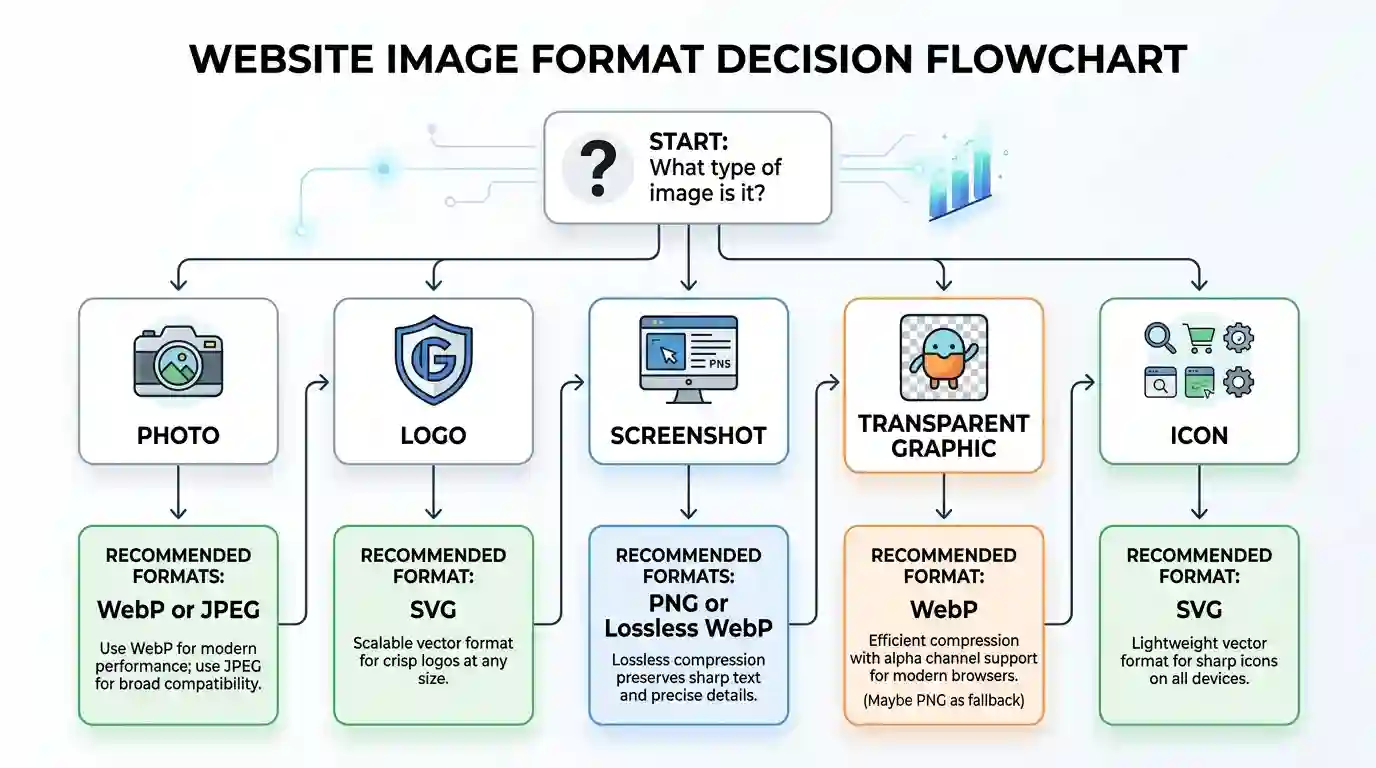
Here is a simple workflow you can use for almost any website.
Step 1: Choose the Correct Format
Use JPEG or WebP for photos. Use PNG, SVG, or lossless WebP for logos, icons, screenshots, and graphics with transparency. Use AVIF when your website setup supports it properly.
Step 2: Resize the Image
Resize the image to the largest size needed on your website. Do not upload a camera-size image directly to your CMS.
Step 3: Start with 80% Quality
For JPEG and WebP, begin at 80% quality. This is a strong starting point for most website images.
Step 4: Compare Before and After
Look at the original and compressed image side by side. Check important details, especially faces, product textures, text, and gradients.
Step 5: Reduce Further If Quality Looks Good
If the image still looks sharp, try 75%, then 70%. Stop when visible quality loss begins.
Step 6: Test on Real Pages
Do not judge only inside the editing tool. Upload the image and test it on the actual page. Check desktop, tablet, and mobile views.
Step 7: Monitor Performance
Use performance tools to review image size, LCP, and total page weight. Image compression should support real speed improvements, not just smaller files in isolation.
Conclusion
The best compression level for website images depends on the image format, visual purpose, and page performance goal. For most websites, the best starting point is JPEG at 75–85% quality or WebP at 75–85% quality. Product images, portfolio photos, and brand visuals may need higher quality, while thumbnails, background images, and decorative graphics can usually be compressed more aggressively.
The smartest strategy is not to chase the smallest file at any cost. Instead, aim for the smallest file size that still looks professional on real devices. Use WebP where possible, keep PNG for graphics that need sharpness or transparency, use SVG for icons and logos, and always resize images before uploading them.
Good image compression improves page speed, SEO, mobile performance, user experience, and conversion rates. When done correctly, visitors will not notice the compression, but they will notice that your website loads faster.
FAQs
What is the best compression level for website images?
The best compression level for website images is usually 75–85% quality for JPEG and WebP. This range gives a strong balance between image quality and file size for most blogs, business websites, and landing pages.
Is 80% image quality good for websites?
Yes, 80% quality is a good starting point for most website images. It keeps images visually clean while reducing file size. You can test lower levels like 75% or 70% if the image still looks good.
Should I use JPEG or WebP for website images?
WebP is usually better for modern websites because it often creates smaller files than JPEG while keeping good quality. JPEG is still useful for compatibility and photography workflows, but WebP is generally preferred for web performance.
Is PNG good for website images?
PNG is good for logos, screenshots, transparent images, and graphics with text. However, PNG is not ideal for large photos because it can create very large files. For photos, use JPEG, WebP, or AVIF.
Does image compression affect SEO?
Yes, image compression can affect SEO indirectly by improving page speed, mobile experience, and Core Web Vitals. Faster-loading pages usually create a better user experience, which can support better search performance.
Can image compression reduce image quality?
Yes, lossy compression can reduce image quality if used too aggressively. The key is to compress enough to reduce file size without creating visible blur, artifacts, or color issues.
What is the best image format for fast loading?
WebP is one of the best image formats for fast loading because it provides strong compression and good quality. AVIF can also be very efficient, while SVG is best for logos and icons.
How small should website images be?
There is no fixed size, but most blog images should ideally be under 100–250 KB when possible. Hero images may be larger, but they should still be resized and compressed carefully.
Should I compress images before uploading to WordPress?
Yes, compressing images before uploading to WordPress is a good practice. You can also use image optimization plugins, but starting with properly resized and compressed images gives better control.
What happens if I over-compress images?
Over-compressed images may look blurry, pixelated, washed out, or unprofessional. This can hurt user trust, especially on ecommerce, portfolio, photography, and service websites.