SUMMARY
Image compression is the process of reducing a file’s size while preserving as much visual quality as possible — and doing it right requires understanding the difference between lossy and lossless methods, choosing the correct file format, and using the right tools for your specific use case. Whether you are a web developer optimizing page speed, a photographer archiving work, or a business managing thousands of product photos, this guide covers every method, metric, and technique you need to compress images intelligently — from format selection and chroma subsampling to automation pipelines and quality scoring metrics like SSIM and PSNR.
Table of Contents
- What Is Image Compression? (And Why It Matters)
- Key Concepts and NLP/LSI Terms You Should Know
- Best Image Formats for High-Quality Compression
- How to Compress Images Without Losing Quality — Step-by-Step
- Advanced Techniques for Quality-Preserving Compression
- Image Compression for Different Use Cases
- Common Mistakes That Ruin Image Quality
- How to Measure Image Quality After Compression
- Automating Image Compression at Scale
- Frequently Asked Questions
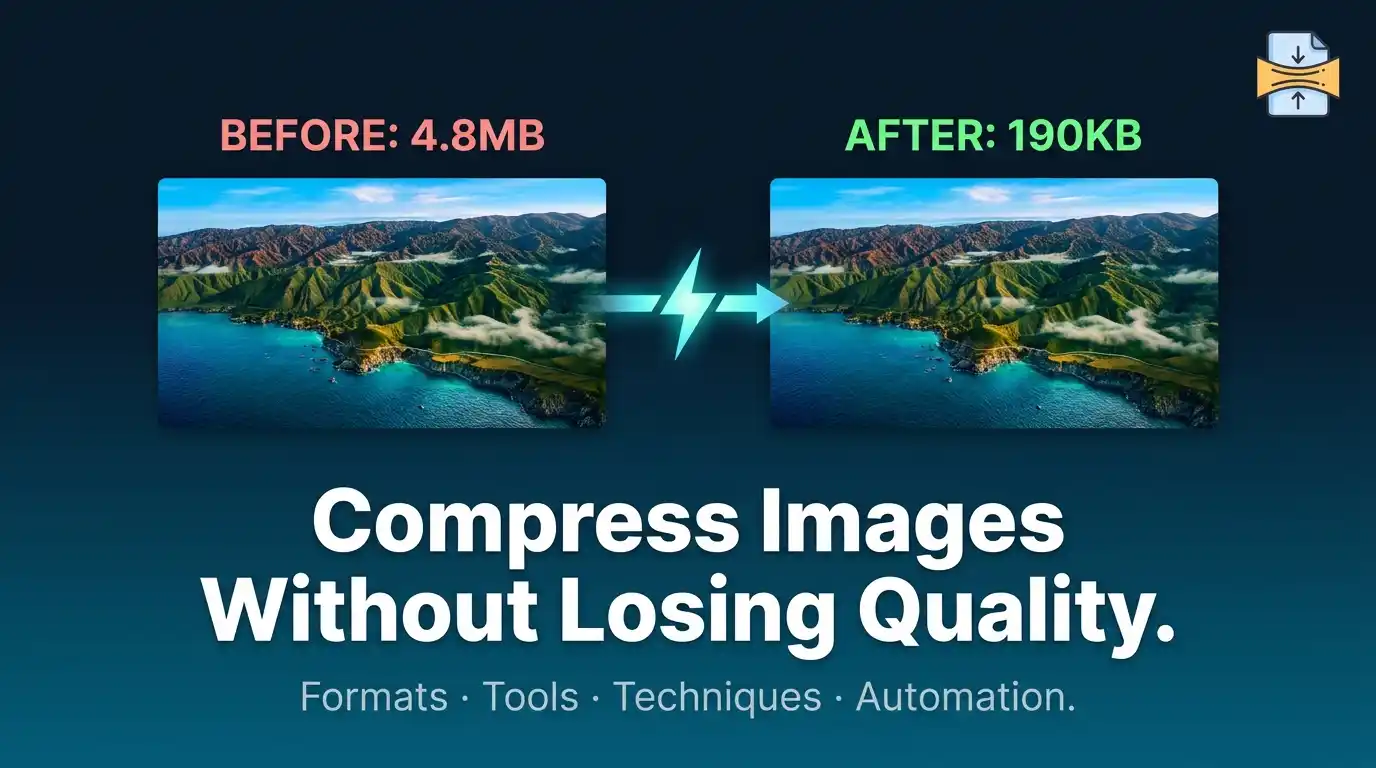
How to Compress Images Without Losing Quality: The Complete Guide
Every second a webpage takes to load, users leave. Studies consistently show that page load time is one of the highest-impact factors in both user experience and SEO rankings — and unoptimized images are the single biggest culprit behind slow load times. The average webpage contains several megabytes of image data, and most of it is completely unnecessary.
The good news: you can dramatically reduce image file sizes without any visible drop in quality — if you know what you’re doing. This guide walks you through every aspect of the topic, from foundational theory to practical workflows.
What Is Image Compression? (And Why It Matters)
Image compression is a data encoding process that reduces the number of bits required to represent an image. The goal is to make files smaller, so they load faster, consume less bandwidth, and take up less storage — ideally without any perceptible degradation in visual quality.
Why does it matter?
- Web performance: Google’s Core Web Vitals ranks pages partly on image load speed. Large images directly hurt your Largest Contentful Paint (LCP) score.
- Storage costs: For businesses storing millions of assets, even a 30% size reduction translates to significant savings.
- User experience: A 1-second delay in load time can reduce conversions by 7%, according to research cited by Google PageSpeed Insights.
- Mobile data: Mobile users on limited data plans appreciate faster-loading, lighter pages.
Lossy vs. Lossless Compression Explained
There are two fundamental types of image compression:
Lossy Compression permanently removes image data that the algorithm judges to be least perceptible to the human eye. Once discarded, that data is gone. JPEG is the most famous lossy format. At moderate quality settings (75–85%), the human eye often cannot detect any difference from the original — yet file size is reduced by 60–80%.
Lossless Compression reduces file size by encoding data more efficiently without discarding any information. The original image can be perfectly reconstructed from the compressed file. PNG and WebP (in lossless mode) use this approach. Lossless compression typically achieves smaller reductions — around 10–30% — but is essential when pixel-perfect accuracy is required, such as in medical imaging, logos, or screenshots.
The practical rule: Use lossy for photographs and rich imagery. Use lossless for logos, icons, UI elements, and images with text.
How Human Vision Influences Compression Algorithms
Modern compression algorithms — especially JPEG and WebP — are deeply informed by the science of human visual perception (HVP). The human eye is:
- More sensitive to luminance (brightness) than chrominance (color)
- Less sensitive to high-frequency detail in areas of uniform color
- More sensitive to edges and contrast
Compression algorithms exploit these weaknesses. They retain luminance data at higher fidelity and discard subtle color variation that your eyes won’t miss. This psychovisual optimization is what allows aggressive compression with minimal perceived quality loss.
Key Concepts and Terms You Should Know
To fully understand image compression, familiarize yourself with these terms — they appear throughout documentation, tools, and literature on this topic:
| Term | Definition |
| Artifact | Visible distortion introduced by compression (e.g., “blockiness” in JPEGs) |
| Bit depth | Number of bits used per color channel; higher = more color information |
| Chroma subsampling | Reducing color resolution while preserving brightness |
| DPI / PPI | Dots/pixels per inch — resolution metric for print and screen |
| Encoding | The algorithm process that converts raw pixel data to a compressed format |
| Entropy coding | Final compression stage using Huffman or arithmetic coding |
| Metadata | Embedded data (EXIF, IPTC) that adds file size without visual content |
| Progressive JPEG | JPEG that renders in increasing quality passes as it loads |
| Quantization | Rounding of frequency coefficients — main source of lossy quality reduction |
| SSIM | Structural Similarity Index — a metric for comparing image quality |
| Transcoding | Converting from one format to another (e.g., JPEG to WebP) |
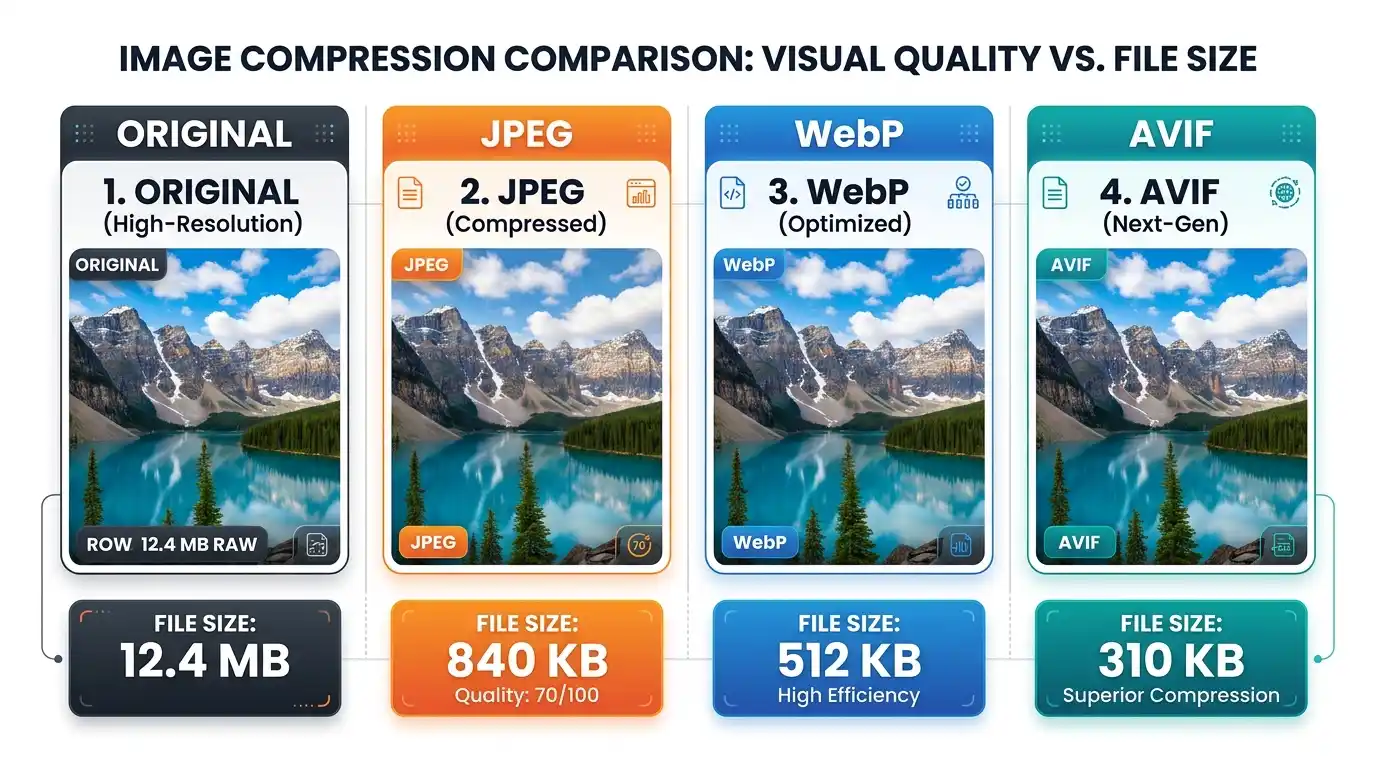
Best Image Formats for High-Quality Compression
Choosing the right format is the most impactful single decision in image compression. Using the wrong format can mean you lose quality even at large file sizes — or you preserve quality but with no size reduction.
JPEG — The Old Reliable
JPEG (Joint Photographic Experts Group) remains the most widely used format for photographs. It uses Discrete Cosine Transform (DCT) — breaking an image into 8×8 pixel blocks and compressing each block’s frequency data.
Best for: Photographs, complex scenes with gradients, product images. Quality sweet spot: 75–85 on a 0–100 scale. Avoid for: Images with text, sharp lines, transparency
Pro tip: Re-saving a JPEG multiple times stacks quality loss. Always work from the original source file.
PNG — Transparency and Sharpness
PNG (Portable Network Graphics) uses DEFLATE compression — a lossless algorithm. It excels at preserving sharp edges, flat colors, and transparency (alpha channel).
Best for: Logos, icons, screenshots, UI elements, images with text overlays. Not ideal for: Large photographs (file sizes balloon)
WebP — The Modern Standard
Developed by Google, WebP supports both lossy and lossless modes and consistently outperforms JPEG and PNG at equivalent quality levels — achieving 25–35% smaller file sizes than JPEG at the same visual quality.
Best for: Web use across nearly all image types Browser support: Excellent — supported by all modern browsers (Chrome, Firefox, Safari, Edge)
AVIF — The Next Frontier
AVIF (AV1 Image File Format) is the newest major image format, derived from the AV1 video codec. It offers even better compression than WebP — 50% smaller than JPEG at equivalent quality — while supporting HDR, wide color gamut, and transparency.
Best for: Future-proof web delivery, high-quality photography. Limitation: Encoding is slower; browser support is still growing, but now covers the majority of users
How to Compress Images Without Losing Quality — Step-by-Step
Using Online Tools
Online tools are the fastest option for individuals and small teams. They require no installation and handle compression through browser-based or server-side algorithms.
The best approach: always use tools that offer preview-before-download functionality, so you can visually inspect quality before committing to a compression level. For a quick and reliable starting point, explore Free Image Compression Tools — a curated set of browser-based utilities that handle JPEG, PNG, WebP, and more without quality compromise.
Top online tools:
- Squoosh.app (by Google) — best-in-class visual quality control, supports WebP and AVIF
- TinyPNG / TinyJPG — simple drag-and-drop, great for PNGs
- Compressor.io — supports multiple formats with a quality slider
- ImageOptim Online — strong lossless optimization
Using Desktop Software (Photoshop, GIMP, etc.)
Adobe Photoshop: Use File → Export → Export As (not “Save for Web” in older versions). Set quality to 75–80 for JPEG. Enable the “Convert to sRGB” option for web. For WebP, ensure your Photoshop version supports it or install a plugin.
GIMP (Free Alternative): File → Export As → Select format → Advanced Options. GIMP supports JPEG, PNG, and WebP natively. You can control quality, metadata stripping, and progressive loading.
Affinity Photo: Offers excellent export controls with real-time preview and supports AVIF in recent versions.
Using Command-Line Tools
For developers and power users, command-line tools offer precision and scriptability.
ImageMagick:
bash
convert input.jpg -quality 82 -strip output.jpg
The -strip flag removes all metadata, which alone can shave 10–20KB off typical photos.
cwebp (WebP encoder):
bash
cwebp -q 80 input.jpg -o output.webp
FFmpeg (for AVIF):
bash
ffmpeg -i input.jpg -c:v libaom-av1 -crf 35 output.avif
MozJPEG: Mozilla’s JPEG encoder produces 10–15% smaller files than standard libjpeg at equivalent quality. Available via the mozjpeg package on npm or Homebrew.
Batch Compression Techniques
When dealing with hundreds or thousands of images, manual compression is impractical. Batch methods include:
- ImageMagick mogrify: Process entire directories in one command
- Sharp (Node.js library): Fast, production-grade image processing for JavaScript backends
- Pillow (Python): Highly scriptable; great for custom pipelines
- Squoosh CLI: Google’s CLI version of Squoosh for automated WebP/AVIF conversion
Advanced Techniques for Quality-Preserving Compression
Chroma Subsampling
As noted earlier, your eyes are less sensitive to color than brightness. Chroma subsampling exploits this by reducing color information at a ratio while keeping full luminance detail.
Common ratios:
- 4:4:4 — Full color data (no subsampling)
- 4:2:2 — Color sampled at half horizontal resolution
- 4:2:0 — Color sampled at half horizontal and half vertical resolution (most common in JPEG)
For web photos, 4:2:0 is standard and imperceptible to most viewers. For print or professional photography, 4:4:4 may be preferred.
Progressive Rendering
A progressive JPEG loads in multiple passes — first showing a low-quality, blurry version instantly, then sharpening with each subsequent pass. This creates a perception of faster loading even if the total download time is similar.
Enable progressive encoding in ImageMagick:
bash
convert input.jpg -interlace Plane output.jpg
Metadata Stripping
Every photo taken with a modern camera or smartphone carries EXIF metadata: GPS coordinates, camera model, timestamp, lens data, and more. This metadata is invisible in the image itself but adds real file size — often 30–100KB on a single photo.
Stripping metadata is lossless from a visual standpoint and is one of the easiest quick wins in image optimization. Tools like ExifTool, ImageOptim, and the -strip flag in ImageMagick handle this in seconds.
Resolution Optimization Before Compression
A 4000×3000px image displayed at 800×600px is carrying three times the pixel data it needs. Resizing to the display dimensions before compression is the most efficient reduction method — often more impactful than compression itself.
Rule: Never serve an image larger than its display size.
Image Compression for Different Use Cases
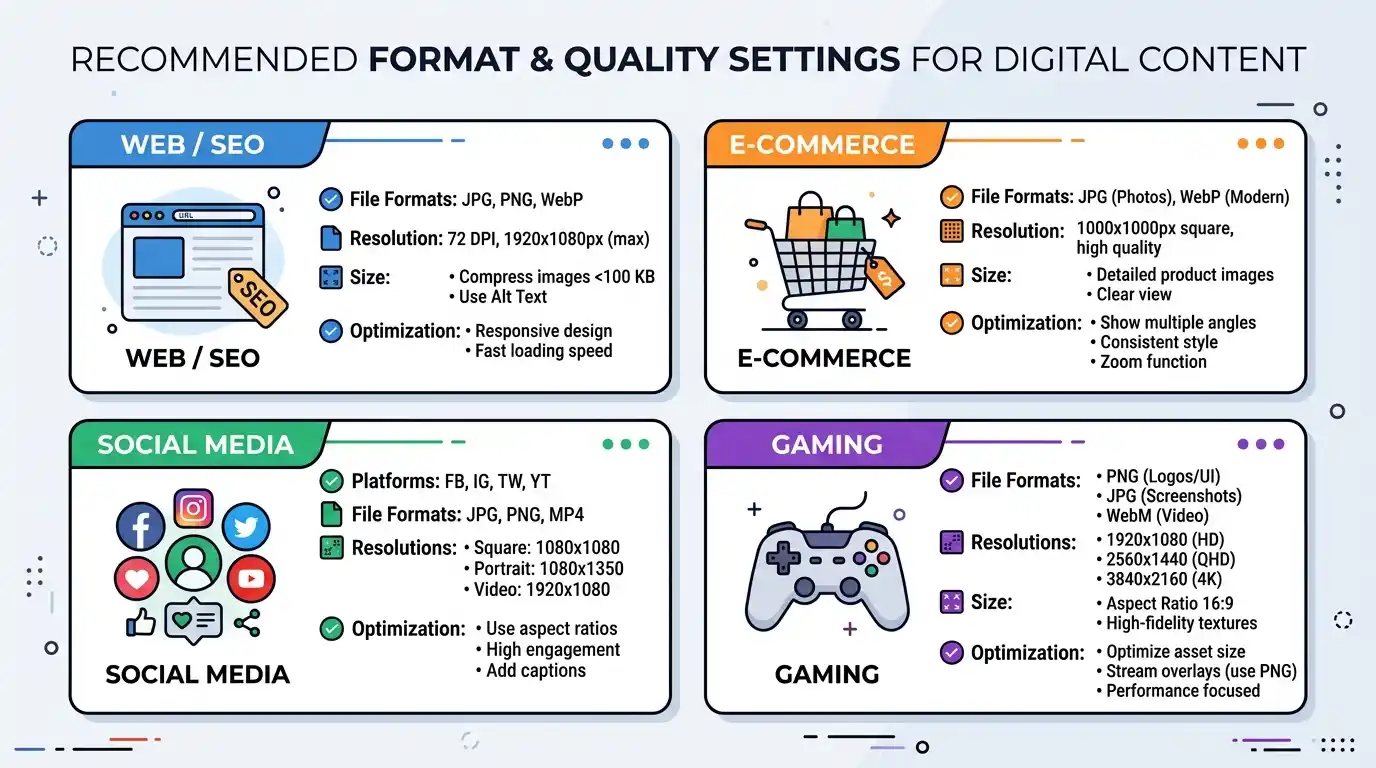
For Websites and SEO
- Serve images in WebP or AVIF format
- Use responsive images with srcset to serve different resolutions based on screen size
- Enable lazy loading (loading=”lazy” attribute in HTML)
- Target under 200KB per image for above-the-fold content
- Compress all images before uploading — never rely solely on CMS compression
For E-Commerce Product Photos
Product images need to be sharp and detailed — trust is built visually. Use JPEG at 80–85 quality for product images. For images with transparent backgrounds, use WebP with alpha instead of PNG for smaller file sizes. Maintain consistency in size (e.g., 1000×1000px) for grid layouts.
For Social Media
Each platform recompresses uploaded images on its own — often aggressively. To minimize double-compression artifacts: upload at the platform’s exact recommended dimensions and at high quality (90+). Facebook and Instagram use JPEG internally, so uploading as JPEG at high quality gives you more control over the compression path.
For Gaming and Apps
If you’re a developer noticing performance issues, texture atlas compression and proper sprite sheet optimization are crucial. Unoptimized texture assets are a major contributor to game performance bottlenecks — especially on mobile devices. If you’re experiencing unexpected visual or performance issues, Gamer lagging issues, explore article for a deeper breakdown of how assets and system resources interact.
Common Mistakes That Ruin Image Quality
- Re-saving JPEGs repeatedly — Each save degrades quality. Always edit from the original.
- Compressing an already-compressed image — Stacked compression multiplies artifacts.
- Using PNG for photos — Massive file sizes for no visual benefit.
- Ignoring resolution — Compressing a 4K image intended for a 300px thumbnail is wasteful.
- Choosing quality 100 in JPEG — Still lossy, but nearly double the file size of quality 85 for no perceptible improvement.
- Forgetting to strip metadata — Leaving GPS data, camera info, and thumbnails embedded.
- Not testing on mobile — What looks fine on desktop may pixelate on Retina displays if the resolution is too low.
How to Measure Image Quality After Compression
Visual inspection alone is insufficient at scale. Use quantitative metrics:
PSNR, SSIM, and Perceptual Quality Metrics
PSNR (Peak Signal-to-Noise Ratio): Measures the ratio between maximum possible signal power and noise introduced by compression. Higher is better; above 40dB is generally considered excellent for web use.
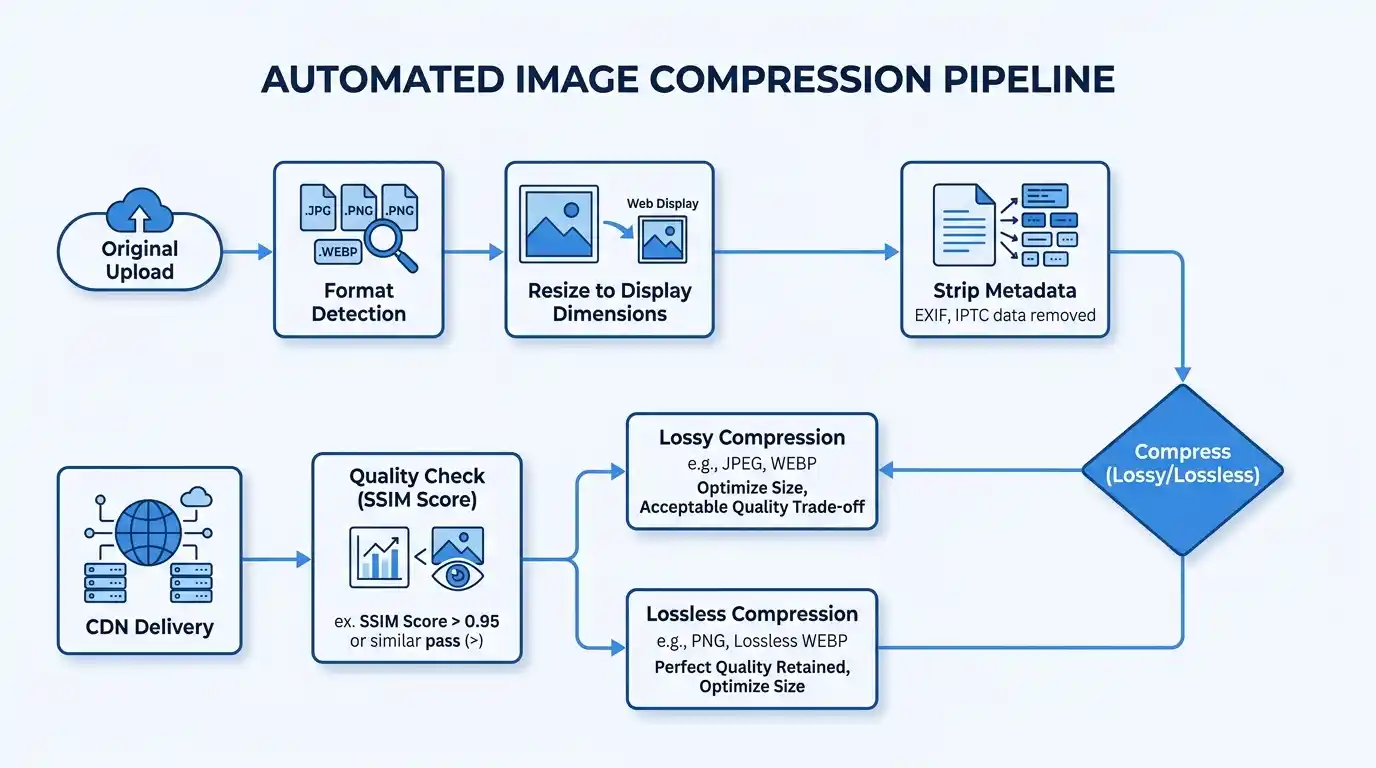
SSIM (Structural Similarity Index Measure): A more perceptually accurate metric that compares luminance, contrast, and structure between original and compressed images. Scores range from 0 to 1; above 0.95 is generally imperceptible to humans.
VMAF (Video Multimethod Assessment Fusion): Originally developed by Netflix for video, increasingly used for image quality too. Highly correlated with human perception.
Butteraugli: Google’s perceptual similarity metric, designed specifically for photographic images and used internally by the Guetzli and WebP teams.
Use tools like ffmpeg -i with PSNR/SSIM filters, or the dssim CLI tool, to score your compression pipeline objectively.
Automating Image Compression at Scale
For large websites, SaaS platforms, or content pipelines, manual compression is not viable. Modern approaches include:
CDN-level optimization: Services like Cloudflare Images, Cloudinary, and imgix automatically serve the optimal format and size based on the requesting device and browser. They handle WebP/AVIF delivery, on-the-fly resizing, and caching — transparently.
Build pipeline integration: Tools like imagemin (webpack plugin), next/image (Next.js), and vite-plugin-imagemin compress assets at build time automatically.
CMS integration: WordPress plugins like ShortPixel, Smush, and Imagify compress images on upload and can bulk-process existing media libraries.
CI/CD pipeline checks: Add image size budget checks to your CI pipeline — fail the build if any image exceeds a defined threshold. Tools like Calibre and Lighthouse CI support this.
Frequently Asked Questions
Q: Can I compress an image without any quality loss at all? Yes — using lossless compression (PNG, lossless WebP, or lossless AVIF). However, size reductions are more modest than those of lossy methods.
Q: What is the best image format for websites in 2025? WebP offers the best balance of compression, quality, and browser support. AVIF is slightly better technically, but slower to encode. A best-practice setup serves AVIF to supported browsers and WebP as a fallback.
Q: How much should I compress images for SEO? Target under 100KB for most images, under 200KB for large hero images. Focus on Core Web Vitals scores as your benchmark, not arbitrary size limits.
Q: Does compressing images affect print quality? Yes. For print, maintain lossless originals at 300 DPI. Never print from web-compressed images; always export print-ready files separately.
Q: Is there a free tool to compress images in bulk? Yes — Squoosh CLI, ImageMagick, and Sharp (Node.js) are all free and handle batch compression efficiently. For browser-based options, explore the Free Image Compression Tools available online.