Summary
Image upload errors are among the most frustrating and frequently encountered technical problems across websites, CMS platforms, social media, and cloud storage services. This comprehensive guide covers every major cause of image upload failures — including file size limits, unsupported formats, browser conflicts, server misconfigurations, CORS policy issues, and permission errors — and provides clear, actionable, step-by-step fixes for each scenario. Whether you are a casual user, content creator, web developer, or system administrator, this resource equips you with all the diagnostic methods and troubleshooting techniques needed to resolve image upload errors quickly and permanently.
Table of Content
How to Fix Image Upload Errors (Step-by-Step)
- What Are Image Upload Errors?
- Common Causes of Image Upload Failures
- Step-by-Step Fixes for Image Upload Errors
- Browser-Specific Troubleshooting
- Platform-Specific Fixes
- Server-Side and Advanced Configuration Fixes
- Dealing with Corrupted Image Files
- Image Upload Error Fixes on Mobile Devices
- Best Practices to Prevent Image Upload Errors
- Tools and Resources
- Frequently Asked Questions (FAQs)
How to Fix Image Upload Errors (Step-by-Step)
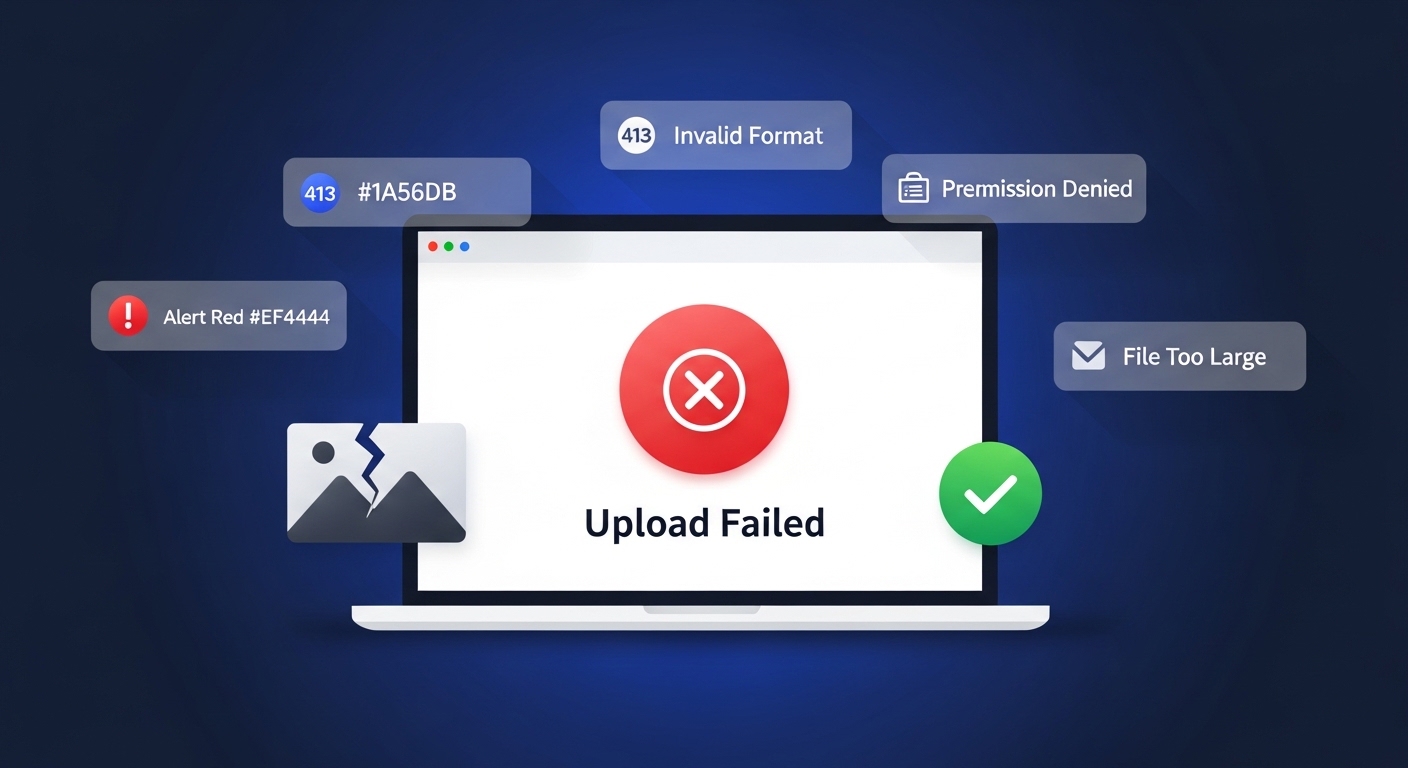
If you have ever tried to upload a photo to a website, CMS dashboard, social media profile, or cloud storage and received a vague error message, you are not alone. Image upload errors are among the most frequently reported technical issues across the internet. They can appear as cryptic HTTP codes like “413 Request Entity Too Large,” ambiguous warnings such as “Invalid file type,” or completely silent failures where the upload progress bar reaches 100% but nothing saves.
Understanding why these errors occur and how to fix them systematically can save hours of frustration. This guide covers every common and uncommon cause of image upload failures, with semantic coverage of related topics including: image upload not working, photo upload error fix, upload failed image troubleshooting, image file rejected by server, why won’t my image upload, failed to upload photo, and image processing error.
What Are Image Upload Errors?
Image upload errors are failures that occur when a user attempts to transfer an image file from their local device to a remote system — whether a website, cloud platform, CMS, or web application. These errors can originate at multiple layers of the technology stack: the client-side (browser or device), the network layer, or the server-side (hosting environment, application logic, or database).
Types of Image Upload Errors
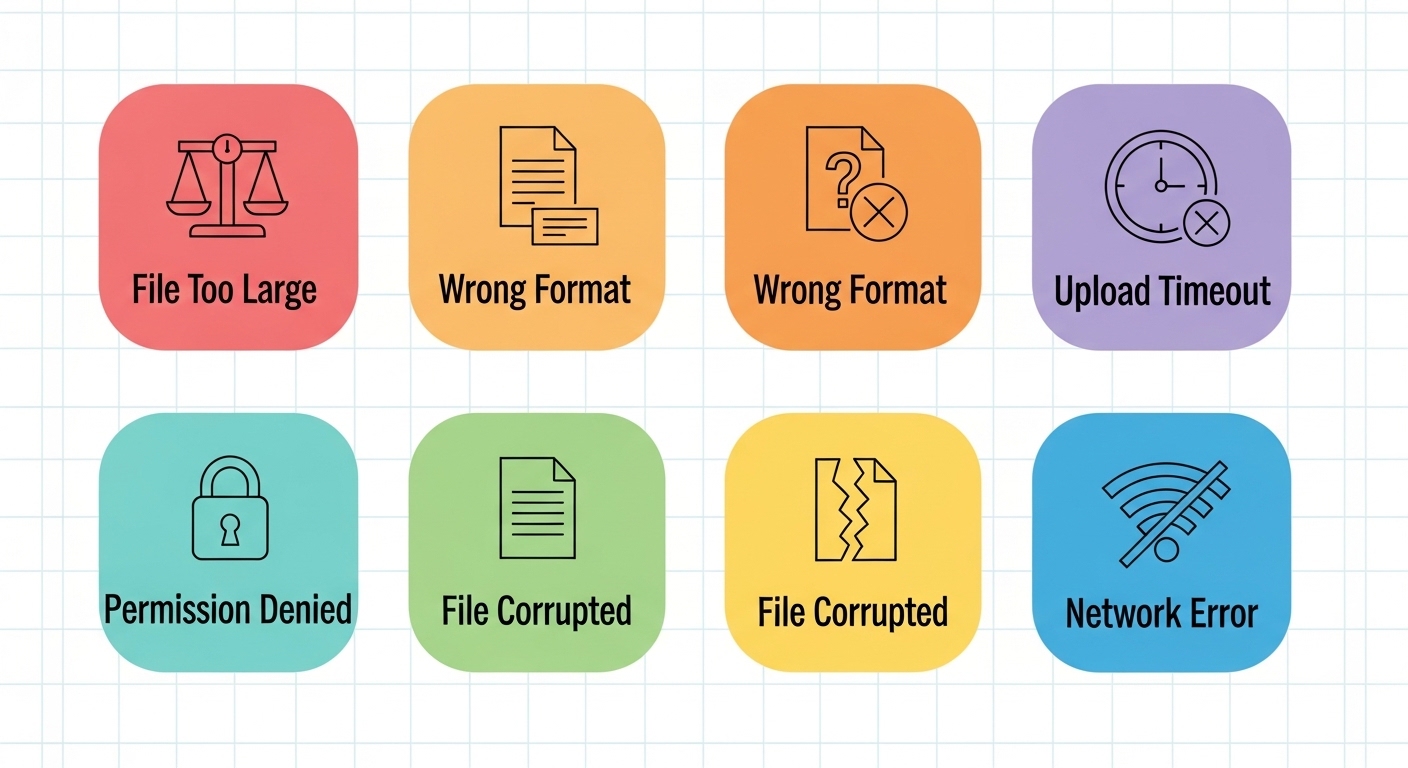
Understanding the category of your error is the first step toward fixing it:
- File Size Errors — The file exceeds the server or platform’s maximum upload size limit
- File Type Errors — The format (HEIC, TIFF, BMP, RAW) is unsupported or not in the server’s MIME type whitelist
- Dimension Errors — Image resolution or pixel dimensions exceed or fall below platform thresholds
- Server Timeout Errors — The upload takes too long, and the connection is dropped mid-transfer
- Permission Errors — The user account or server process lacks write access to the target directory
- Corrupted File Errors — The image file itself is damaged, incomplete, or has a mismatched file signature
- Network Errors — Unstable or slow internet connection interrupts the upload process
- CORS Errors — Cross-Origin Resource Sharing policy blocks the upload request from the browser
- PHP/Server Configuration Errors — Server settings cap file processing below the user’s upload size
Common Causes of Image Upload Failures
Before jumping to solutions, identifying the root cause is critical. The following are the most prevalent technical reasons behind image upload failures.
File Size Exceeds the Maximum Limit
Most platforms enforce a maximum upload file size. WordPress defaults to 2MB (though hosts typically extend this), Shopify allows up to 20MB per image, and Facebook caps profile photos at 8MB. When your file exceeds these thresholds, the server either rejects it immediately or drops the connection mid-upload.
Unsupported or Unrecognized File Format
Not all image formats are universally accepted. While JPEG, PNG, GIF, and WebP enjoy broad support, formats like HEIC (iPhone default), TIFF, RAW, BMP, and SVG are frequently rejected depending on the platform’s allowed MIME type list. When a server’s validation layer encounters an unrecognized MIME type, it typically returns a “file type not allowed” or “invalid image format” error.
Server-Side Configuration Restrictions
On self-hosted platforms running WordPress, Drupal, Joomla, or Magento, server configuration files — php.ini, .htaccess, and nginx.conf — control upload behavior. Incorrect or overly conservative values for upload_max_filesize, post_max_size, or max_execution_time are a leading cause of upload failures that users cannot resolve from the front end without administrative server access.
Browser Extension Conflicts and Cache Issues
Ad blockers, privacy extensions, VPN add-ons, and outdated cached session data can all interfere with AJAX-based upload scripts. A stale session token or corrupted cache entry can silently block uploads without producing a visible error message, making these issues particularly difficult to diagnose.
File Corruption
An image file can become corrupted during download, file transfer, or editing. A corrupted image may open correctly in a viewer but fail when parsed by a server-side image processing library such as GD, Imagick, or Python Pillow. Corruption is often invisible to the user until the upload triggers a validation failure.
Insufficient User Permissions
In multi-user environments, role-based access control (RBAC) may restrict certain user types from uploading media. In WordPress, Subscriber-level accounts have no media upload capability by default. On Linux web servers, incorrect file ownership or chmod settings can block the web server process (www-data, apache, nginx) from writing to the uploads directory.
Network Instability and Timeout
Large image uploads over slow or unstable connections can exceed the server’s max_execution_time or max_input_time, causing the connection to drop mid-upload. This is especially common on mobile data networks or when uploading multiple high-resolution files simultaneously.
Step-by-Step Fixes for Image Upload Errors
Work through these steps in order. Earlier fixes often resolve multiple issues simultaneously, and each step narrows down the problem if it does not fully resolve it.

Step 1 — Confirm the Error Type
- Open your browser’s Developer Tools (F12 on Windows/Linux, Cmd+Option+I on Mac)
- Go to the Network tab and attempt the upload again
- Look for a failed request (shown in red) and note the HTTP status code:
- 400 Bad Request — Invalid data or malformed headers
- 403 Forbidden — Permission denied at the server level
- 413 Payload Too Large — File exceeds the server’s configured size limit
- 422 Unprocessable Entity — File fails format or content validation
- 500 Internal Server Error — Server-side processing failure (check logs)
- Also, check the Console tab for JavaScript errors related to the upload component
Step 2 — Compress and Resize the Image
If the error relates to file size, compressing the image before uploading is the fastest resolution. Options include:
- Online tools: TinyPNG, Squoosh (by Google), Compressor.io — for quick lossy or lossless compression
- Desktop software: Adobe Photoshop (Save for Web), GIMP (Export As), or macOS Preview
- Command line: ImageMagick’s convert input.jpg -quality 85 output.jpg
Target sizes: Keep images under 1MB for blog posts, under 500KB for thumbnails, and under 200KB for icons and avatars. Always keep a backup of the original high-resolution file before compressing.
Step 3 — Convert to a Compatible Format
If the error indicates an unsupported file type, convert your image to JPEG or PNG — the two most universally accepted web formats. Use the free browser-based tool to convert JPG to PNG instantly, or convert PNG to JPG to reduce file size while maintaining quality — no software installation required.
For HEIC files from iPhones, convert to JPEG using iMazing HEIC Converter, Adobe Lightroom, or macOS Preview (File > Export as JPEG).
Step 4 — Clear Browser Cache and Disable Extensions
- Press Ctrl+Shift+Delete (Windows) or Cmd+Shift+Delete (Mac) to open the Clear Browsing Data dialog
- Select Cached images and files and Cookies and site data
- Choose All time from the time range dropdown and click Clear data
- Open an Incognito or Private window and retry the upload — this bypasses all extensions
- If the upload works in private mode, systematically disable browser extensions to find the conflicting one
- Common culprits: uBlock Origin, Privacy Badger, HTTPS Everywhere, VPN extensions, and ad blockers
Step 5 — Rename the File and Remove Special Characters
File names containing spaces, special characters (!, @, #, $, &, %, commas, apostrophes), or non-ASCII characters can cause upload failures on systems with strict URL or path validation. Rename the file using only alphanumeric characters, hyphens, and underscores — for example, my-profile-photo.jpg instead of My Photo (2026) !.jpg.
Step 6 — Check and Fix File Permissions (Self-Hosted Platforms)
For WordPress, Drupal, or custom PHP sites hosted on Apache or Nginx:
- Connect to your server via FTP (FileZilla) or SSH
- Navigate to the uploads directory (typically /wp-content/uploads/ for WordPress)
- Set folder permissions to 755 (drwxr-xr-x)
- Set file permissions to 644 (-rw-r–r–)
- Ensure the web server user owns the directory: sudo chown -R www-data:www-data /var/www/html/wp-content/uploads/
Step 7 — Increase PHP Upload Limits (WordPress and PHP Sites)
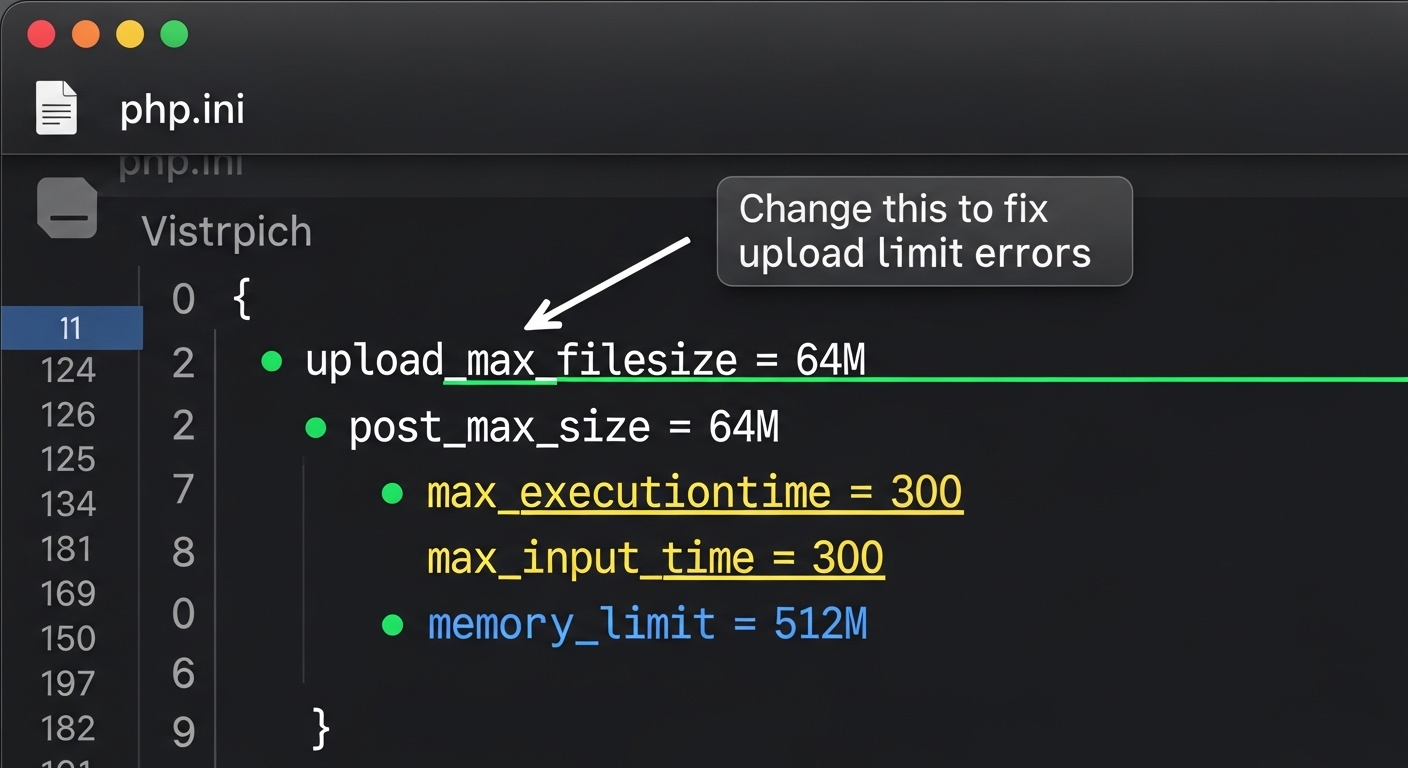
Add the following overrides to your .htaccess file (Apache servers):
php_value upload_max_filesize 64M
php_value post_max_size 64M
php_value max_execution_time 300
php_value max_input_time 300
For WordPress specifically, add to wp-config.php: define(‘WP_MEMORY_LIMIT’, ‘256M’);
If you have direct access to php.ini, edit the same values there and restart the web server after saving.
Browser-Specific Troubleshooting
Google Chrome
- Update Chrome to the latest version via Settings > Help > About Google Chrome
- Disable hardware acceleration if uploads freeze: Settings > Advanced > System
- Reset Chrome flags by navigating to chrome://flags and clicking Reset all
- Check if an enterprise policy is blocking uploads at chrome://policy
Mozilla Firefox
- Clear cache: Menu > Settings > Privacy & Security > Clear Data
- Use Refresh Firefox to reset settings without losing bookmarks: Help > Troubleshooting Information > Refresh Firefox
- Check Enhanced Tracking Protection — it may block upload POST requests on certain domains
Safari (Mac and iOS)
- Go to Safari > Preferences > Privacy and temporarily disable Prevent cross-site tracking
- Clear cache via Develop menu > Empty Caches (enable Develop menu in Safari > Advanced settings)
- On iOS: Settings > Safari > Clear History and Website Data
Microsoft Edge
- Open edge://settings/privacy and clear all browsing data
- Check Tracking Prevention settings — switch to Basic temporarily when troubleshooting uploads
Platform-Specific Fixes
WordPress Image Upload Errors
WordPress is the world’s most widely used CMS, and image upload issues are among its top support requests. Common WordPress-specific errors include “The uploaded file exceeds the upload_max_filesize directive in php.ini,” “HTTP error,” and “Missing a temporary folder.”
- HTTP Error during upload: Usually caused by Imagick/GD library conflicts. Add define(‘WP_MEMORY_LIMIT’, ‘256M’); to wp-config.php and consider switching the image editor library
- Missing temporary folder: Create a temp directory and define it in php.ini: sys_temp_dir = “/path/to/temp”
- Broken thumbnails after fixing: Use the Regenerate Thumbnails plugin to repair all image sizes
- Plugin conflicts: Deactivate all plugins, then re-enable one by one to isolate the conflict
- Switch image editor library: Add add_filter(‘wp_image_editors’, function(){ return [‘WP_Image_Editor_GD’]; }); to functions.php
Shopify
- The maximum image size is 20MB and 4472×4472 pixels per product image
- Supported formats: JPEG, PNG, GIF, WebP — avoid TIFF, BMP, HEIC
- For bulk upload failures, try uploading images individually to identify the problematic file
- Use Shopify’s built-in image editor to resize before the final upload if needed
Wix
- Wix supports images up to 25MB per file
- Use the Wix Image Editor to compress before the final upload
- If the upload progress bar freezes, clear site data specifically for wix.com and retry
Social Media Platforms
- Instagram: Maximum 8MB for photos, JPEG format required, minimum 320px width
- Facebook: Recommends JPEG under 8MB, at least 720px wide for best quality
- Twitter/X: PNG or JPEG under 5MB, animated GIF under 15MB
- LinkedIn: JPEG or PNG under 8MB for profile photos, up to 100MB for posts
Google Drive and Cloud Storage
- Google Drive: Browser uploads cap at 5GB — use the desktop app for larger files
- Dropbox: 50GB per file via the website, no limit via the desktop sync app
- AWS S3: Configure CORS policy correctly and ensure the IAM role grants s3:PutObject and s3:GetObject permissions
Server-Side and Advanced Configuration Fixes
Fixing CORS (Cross-Origin Resource Sharing) Errors
If your browser console shows “No ‘Access-Control-Allow-Origin’ header is present,” the server’s CORS policy is blocking the upload. This is common with third-party upload endpoints and CDNs.
For Apache — add to .htaccess:
Header set Access-Control-Allow-Origin “*”
For Nginx — add inside your server or location block:
add_header ‘Access-Control-Allow-Origin’ ‘*’;
For production environments, replace * with the specific allowed origin domain to avoid security vulnerabilities.
Increasing Nginx Client Max Body Size
Nginx defaults to a 1MB request body limit, which causes silent upload failures for most images. Increase it by adding to your nginx.conf:
client_max_body_size 64M;
After editing, restart Nginx: sudo systemctl restart nginx
Fixing Broken MIME Type Validation
Some servers validate MIME types using file signatures (magic bytes) rather than file extensions. A mislabeled file — such as a PNG renamed to .jpg — will fail this check even though the extension appears correct.
- Re-export the file from an image editor in the correct format — never just rename the extension
- Verify actual MIME type on Linux/Mac: file -i yourimage.jpg
- If you manage the server, review the MIME type whitelist in your application’s file validation code
Resolving 500 Internal Server Error During Upload
- Check server error logs at /var/log/apache2/error.log or /var/log/nginx/error.log
- Look for PHP fatal errors, memory exhaustion messages, or Imagick/GD library crashes
- Increase PHP memory limit in php.ini: memory_limit = 512M
- If using WordPress, switch the image processing library from Imagick to GD
Dealing with Corrupted Image Files
How to Detect a Corrupted Image
- The image opens partially or shows horizontal bands of distorted color
- File size is unusually small compared to similar images from the same source
- The file shows no thumbnail preview in your operating system’s file explorer
- Image editing software throws an error or refuses to open the file
How to Repair Corrupted Images
- Re-download the original from the source — corruption often occurs during file transfer
- Use repair software: JPEG-Repair Toolkit, GIMP (File > Open and Repair), or Stellar Photo Repair for advanced recovery
- Try a different application — sometimes one editor handles header corruption better than another
- Convert via ImageMagick: convert input.jpg -quality 85 output.jpg — this sometimes strips corrupted metadata headers while preserving image data
- SD card recovery: If the file originated from a camera card, use PhotoRec or Recuva to recover the undamaged original
If the same image consistently fails across multiple platforms and all repair attempts fail, the source file is likely unrecoverable. Retake the photo or restore from a backup.
Image Upload Error Fixes on Mobile Devices

iPhone and iOS Devices
- Switch camera format to JPEG: Settings > Camera > Formats > Most Compatible
- Check available device storage — a nearly full device cannot process uploads correctly
- Update both iOS and the relevant app to the latest versions
- For web-based uploads in Safari, grant photo access: Settings > Safari > Photos
Android Devices
- Clear the browser app’s cache: Settings > Apps > Chrome > Storage > Clear Cache
- Grant storage permissions: Settings > Apps > [App Name] > Permissions > Files and Media
- Use a file manager to verify the image is not corrupted before uploading
- Switch from mobile data to Wi-Fi for large image uploads to avoid timeout errors
Best Practices to Prevent Image Upload Errors
Prevention is always more efficient than troubleshooting. These practices significantly reduce the likelihood of encountering upload errors:
- Standardize on JPEG or PNG — these formats have universal support across all major platforms and browsers
- Compress before uploading — target under 1MB for blog post images using tools like Squoosh or TinyPNG
- Use clean file names — alphanumeric characters, hyphens, and underscores only; no spaces or special characters
- Match dimensions to platform specifications — check each platform’s image requirements before uploading
- Use chunked or resumable uploading for large files — libraries like Uppy and FilePond support resumable uploads that survive connection drops
- Validate client-side first — implement JavaScript file validation to catch size and type errors before the server request is even made
- Use Wi-Fi for bulk uploads — avoid mobile data connections when uploading multiple or large files
- Keep CMS and plugins updated — outdated software frequently has fixed upload bugs in newer releases
Tools and Resources
Image Compression: TinyPNG/TinyJPEG, Squoosh (by Google), ImageOptim (Mac), and Compressor.io all offer excellent compression with minimal quality loss.
Format Conversion: Convert between formats instantly using the free browser-based tools: Convert JPG to PNG and Convert PNG to JPG — no software installation required.
Diagnostics: Browser Developer Tools (F12), GTmetrix, PageSpeed Insights, and Pingdom File Size Checker are invaluable for identifying upload bottlenecks and oversized assets.
Related Guides: If you are also encountering document-related failures, the step-by-step resource on how to Fix PDF File Not Opening applies the same systematic diagnostic approach to PDF-specific errors.
For a comprehensive technical reference on web image formats, the MDN Web Docs guide on image file types maintained by Mozilla’s browser engineers is an authoritative, regularly updated resource.
Frequently Asked Questions (FAQs)
Why does my image upload fail even though it is the right format? The file extension may not match the actual format — for example, a PNG file renamed to .jpg. Servers that validate MIME types using file signatures (magic bytes) will reject it regardless of the extension. Re-export the file properly from an image editor rather than simply renaming it.
What does an HTTP 413 error mean when uploading images? HTTP 413 (Request Entity Too Large) means the file exceeds the server’s configured maximum body size. Fix this by compressing the image first. If you manage the server, increase upload_max_filesize and post_max_size in php.ini, or client_max_body_size in nginx.conf.
Why do images upload fine on desktop but fail on my phone? Mobile browsers operate in different security sandboxes with stricter permission models. Ensure the app has storage access permissions, your browser is updated, and the image format is compatible (HEIC in particular causes failures on many platforms). Also, check if the camera captured an unusually high-resolution image exceeding platform dimension limits.
Can a VPN cause image upload errors? Yes. VPNs can trigger security blocks by routing traffic through unexpected IP addresses, and they can significantly reduce upload speeds, causing timeout errors on large files. Disable your VPN temporarily and retry the upload to rule it out as the cause.
How do I fix image upload errors in WordPress specifically? The most effective WordPress fixes are: increasing PHP upload limits in php.ini or .htaccess, setting correct file system permissions on the uploads directory (755 for folders, 644 for files), increasing WordPress memory limit in wp-config.php, deactivating conflicting plugins, and switching the image processing library from Imagick to GD.