Summary
Sending large photos through email can cause delivery failures, slow upload times, and frustrated recipients. Whether you’re attaching vacation pictures, product photos, or work documents, knowing how to reduce photo size for email is an essential skill in today’s digital-first world. This guide walks you through practical methods to compress images without sacrificing quality, covering built-in operating system tools, online compressors, email client settings, and best practices for maintaining image clarity. By the end of this article, you’ll be equipped with multiple techniques to shrink your photo files quickly and efficiently, ensuring smooth email communication every time.
Table of Contents
- Why You Need to Reduce Photo Size for Email
- Understanding Image File Formats and Their Impact
- How to Reduce Photo Size for Email on Windows
- How to Reduce Photo Size for Email on Mac
- Using Online Tools to Compress Photos
- Adjusting Image Settings Within Email Clients
- Best Practices for Maintaining Photo Quality After Compression
- Mobile Methods for Reducing Photo Size
- Conclusion
- FAQs
How to Reduce Photo Size for Email
In an era where smartphones capture images at resolutions exceeding 12, 48, or even 108 megapixels, sharing photos via email has become more complicated than it used to be. High-resolution images often come with file sizes ranging from 3MB to 15MB or more, which can quickly exceed email attachment limits set by providers like Gmail, Outlook, and Yahoo Mail. Most email services cap attachments at 25MB total, meaning a handful of high-resolution photos can easily push you over the limit.
Beyond attachment limits, large image files slow down sending and receiving times, consume more bandwidth, and can clutter recipients’ inboxes. Whether you’re a photographer sending proofs to clients, a real estate agent sharing property photos, or simply someone emailing family pictures, learning how to reduce photo size for email ensures faster, smoother communication.
This comprehensive guide explores multiple approaches—from built-in operating system features to dedicated compression tools—so you can choose the method that best fits your workflow.
Why You Need to Reduce Photo Size for Email
Email providers impose attachment size limits for good reason: large files strain server resources and can cause delays across the entire email delivery chain. When you send oversized photos, several issues can arise:
Bounced emails: If your attachments exceed the provider’s limit, your email may bounce back undelivered, leaving the recipient unaware you tried to send anything at all.
Slow upload and download speeds: Large files take longer to upload from your device and longer for recipients to download, especially on mobile networks or slower internet connections.
Storage consumption: Recipients with limited email storage (particularly on older or free-tier accounts) may find their inbox filling up quickly when receiving multiple high-resolution images.
Compatibility issues: Some email clients struggle to render very large images in preview mode, leading to a poor user experience.
Reducing photo size for email isn’t about sacrificing quality unnecessarily—it’s about finding the right balance between file size and visual fidelity for the intended purpose. A photo meant for printing requires far more resolution than one meant for quick viewing on a smartphone screen.
Understanding Image File Formats and Their Impact
Before diving into compression methods, it’s important to understand how different image formats affect file size and quality.
JPEG (JPG)
JPEG is the most common format for photographs. It uses lossy compression, meaning some image data is discarded to reduce file size. JPEGs are ideal for email because they offer a good balance between quality and size, and most email clients display them without issue.
PNG
PNG files use lossless compression, preserving every pixel of detail. While this makes PNGs great for graphics, logos, and screenshots with text, it also means PNG files are often significantly larger than JPEGs for photographic content.
HEIC
Apple devices often save photos in HEIC format by default. While HEIC files are smaller than JPEGs at similar quality levels, not all email clients and devices support HEIC, which can cause display issues for recipients using Windows or older Android devices.
WebP
Developed by Google, WebP offers superior compression compared to JPEG and PNG while maintaining quality. However, compatibility with older email clients can be limited.
For email purposes, converting photos to JPEG format before sending is generally the safest and most universally compatible choice, especially when paired with compression techniques discussed below.
How to Reduce Photo Size for Email on Windows
Windows users have several built-in and downloadable options for compressing images before attaching them to emails.
Using the Photos App
Windows 10 and 11 come with a built-in Photos app that allows basic resizing:
- Open the photo in the Photos app
- Click on the three-dot menu and select “Resize.”
- Choose a smaller dimension preset (such as “Small” or “Medium”)
- Save the resized copy to a new location
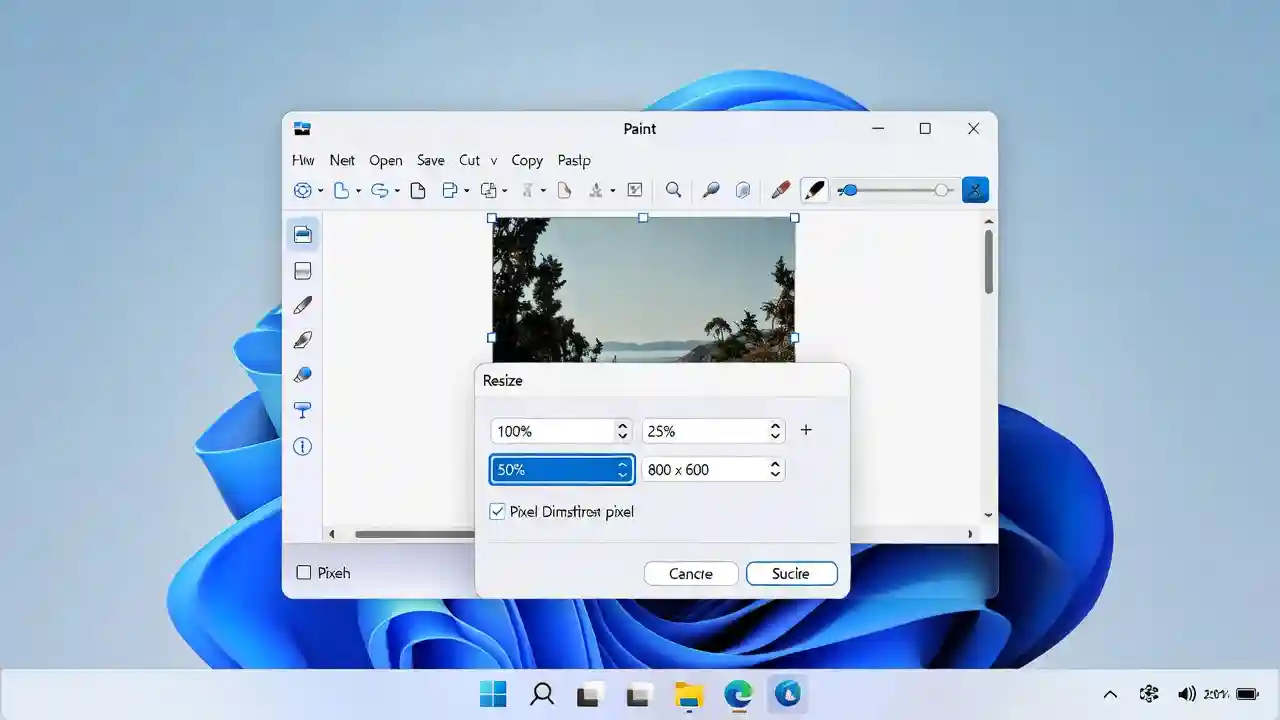
Using Paint
Microsoft Paint, a longtime Windows staple, offers a quick resizing option:
- Right-click the image file and select “Open with Paint.”
- Click “Resize” in the Home tab
- Select “Percentage” and reduce the size to 50% or 25%
- Save the file as a new JPEG
Compressing Multiple Files at Once
For users with multiple photos to send, Windows allows you to compress files into a ZIP folder, though this doesn’t reduce the actual image dimensions—it simply bundles files together. For true size reduction across multiple photos, dedicated batch compression software or online tools are recommended.
How to Reduce Photo Size for Email on Mac
Mac users benefit from the built-in Preview app and Photos app, both of which offer straightforward compression options.
Using Preview
The Preview app, included with macOS, allows quick image resizing:
- Open the image in Preview
- Go to Tools > Adjust Size
- Enter new dimensions (width and height) while keeping “Scale proportionally” checked
- Click “OK” and then export the file using File > Export, choosing a lower quality setting if exporting as JPEG
Using the Photos App
For users managing photos through Apple’s Photos app:
- Select the photo you want to share
- Click File > Export > Export Photos
- Choose a smaller resolution option (Small, Medium, or Large)
- Select JPEG format for better compatibility
Mail App’s Built-In Size Adjustment
Interestingly, Apple’s Mail app has a feature that automatically offers to resize images when you attach them to a new email. A dropdown menu appears with options like “Small,” “Medium,” “Large,” and “Actual Size,” allowing you to choose the appropriate size before sending.
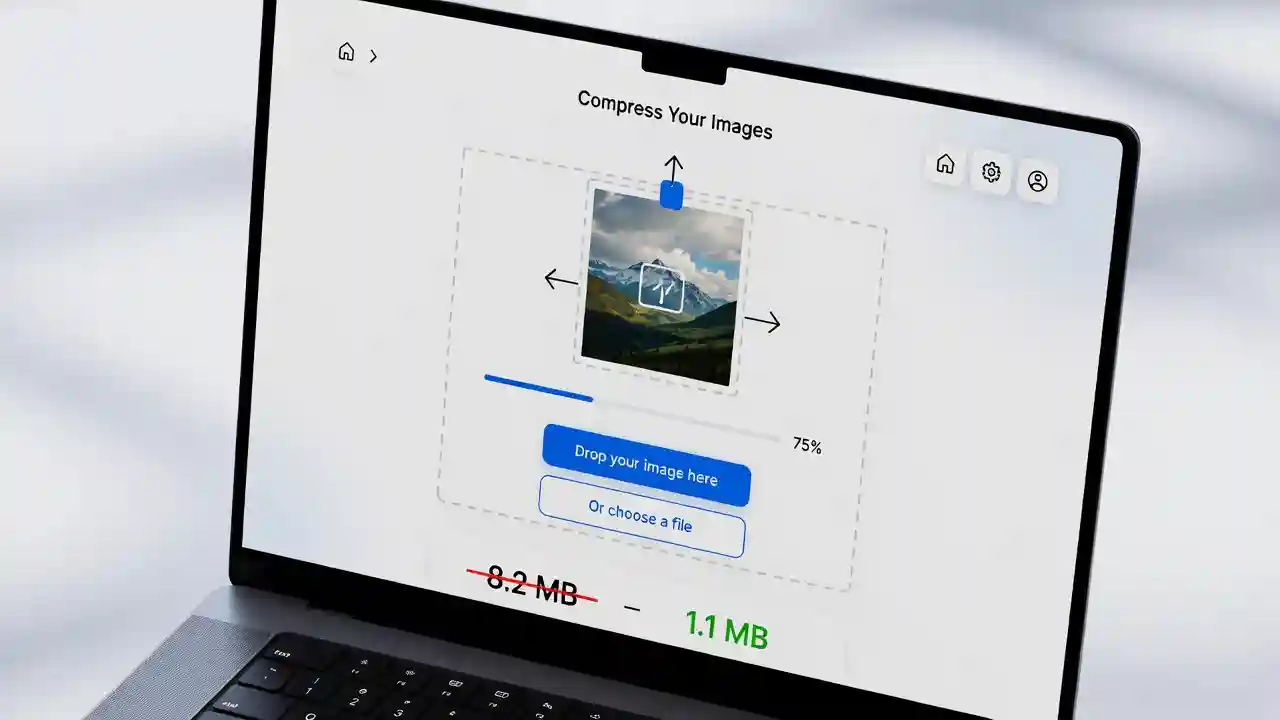
Using Online Tools to Compress Photos
For users who want a quick, platform-independent solution, online image compression tools are excellent options. These web-based services allow you to upload a photo, compress it, and download the smaller version—all without installing software.
Benefits of Online Compressors
Online tools typically offer:
- Drag-and-drop simplicity
- Batch processing for multiple images
- Adjustable quality sliders
- Format conversion options (JPEG, PNG, WebP)
- No software installation required
If you’re looking for reliable, free solutions, you can explore Free Image Optimization Tools that allow you to compress, resize, and convert images quickly—perfect for preparing photos before attaching them to emails.
How Online Compression Works
Most online compressors use algorithms that analyze image data and remove redundant or imperceptible information. This process, often called “lossy compression,” can reduce file sizes by 50-90% with minimal visible quality loss, especially for photographs with complex color gradients and textures.
Adjusting Image Settings Within Email Clients
Many popular email clients have built-in features to help manage attachment sizes automatically.
Gmail
Gmail automatically compresses images when you use the “Insert images inline” feature rather than attaching them as files. However, for attachments, Gmail doesn’t automatically compress—so pre-compression is recommended for files approaching the 25MB limit.
Outlook
Outlook offers an “Image Resizing” feature within its options menu. When enabled, Outlook automatically resizes attached photos to a smaller dimension (such as “Large: 1024 x 768”) before sending, reducing file size significantly.
To enable this in Outlook:
- Click File > Options
- Go to the “Advanced” tab
- Scroll to “Image Size” under “Send messages.”
- Choose your preferred resize setting
Apple Mail
As mentioned earlier, Apple Mail provides an image size dropdown when attaching photos, making it one of the most user-friendly options for quick compression on the fly.
Best Practices for Maintaining Photo Quality After Compression
Reducing file size doesn’t have to mean sacrificing visual quality. Here are some tips to maintain the best possible balance:
Choose the Right Resolution for the Purpose
If the recipient only needs to view the photo on a screen, a resolution of 1024 x 768 pixels or 1920 x 1080 pixels is typically more than sufficient. Printing requires higher resolutions (300 DPI or more), so reserve full-resolution files for print-related requests.
Avoid Repeated Compression
Each time a JPEG is compressed and re-saved, additional quality degradation occurs (a phenomenon known as “generation loss”). Always compress from the original high-quality file rather than compressing an already-compressed version.
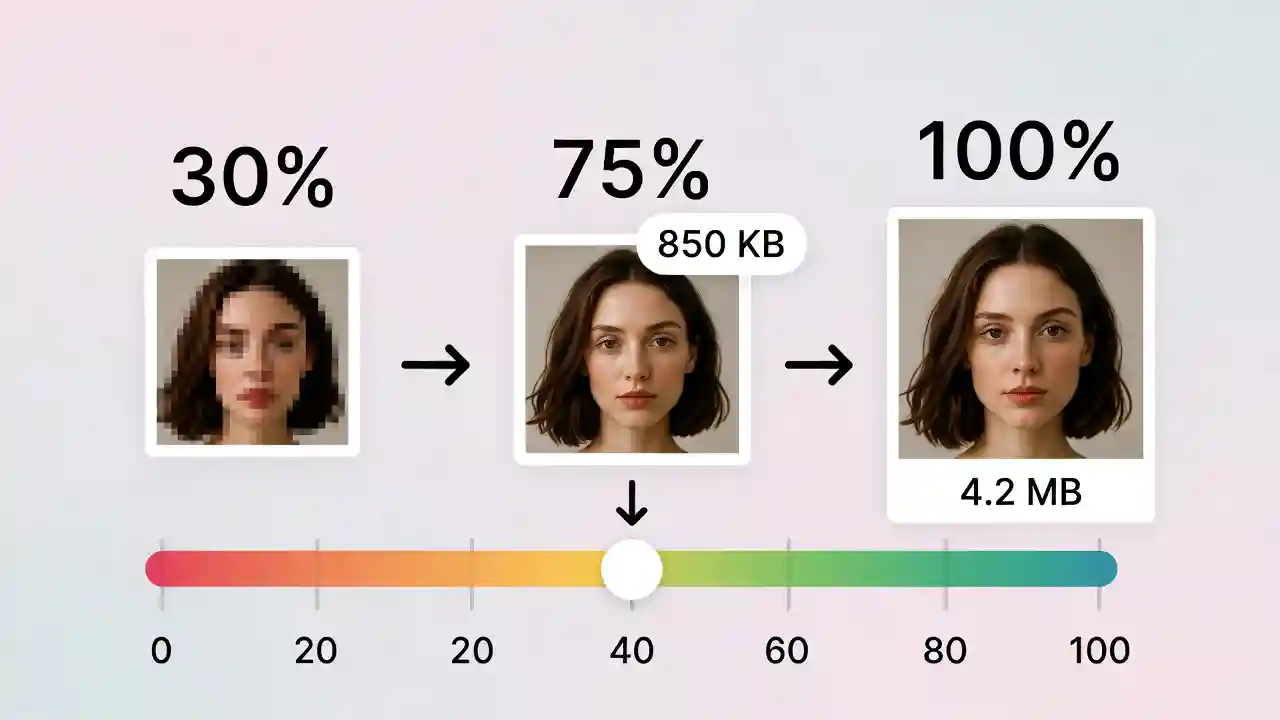
Use Quality Sliders Wisely
Most compression tools offer a quality slider (typically 0-100). Settings between 70-85% often provide an excellent balance—file sizes shrink considerably while quality loss remains nearly imperceptible to the human eye.
Strip Unnecessary Metadata
Photos often contain metadata (EXIF data) including camera settings, GPS location, and timestamps. Removing this data through compression tools can shave off additional file size while also protecting your privacy.
For website owners and content creators, understanding image optimization extends beyond email. To learn more about how compressed images benefit overall site performance, check out this resource on Optimized Images Improve Page Speed, which explains the broader impact of image file sizes on user experience and SEO.
Mobile Methods for Reducing Photo Size
With most photos now taken on smartphones, reducing photo size directly from mobile devices is increasingly important.
iPhone Users
When sending photos via Mail or Messages on iPhone, a size selection prompt (Small, Medium, Large, Actual Size) appears automatically. Choosing “Small” or “Medium” significantly reduces file size before sending.
Additionally, changing the camera settings to capture photos in “High Efficiency” (HEIC) format rather than “Most Compatible” (JPEG) can reduce storage usage, though converting to JPEG before emailing is still recommended for compatibility.
Android Users
Android devices often allow resizing directly within the gallery’s share menu. Some Android phones also offer a “Compress” option when sharing via Gmail or other apps. Third-party apps from the Play Store can also provide batch compression for multiple photos at once.
Using Mobile Apps for Compression
Dedicated mobile apps designed specifically for photo compression allow users to select multiple images, choose a target file size or quality percentage, and export compressed versions ready for emailing—all without needing a computer.
Conclusion
Learning how to reduce photo size for email doesn’t require advanced technical skills—just the right tools and a basic understanding of image formats and compression settings. Whether you prefer built-in operating system features, online compression tools, or email client settings, there’s a solution for every workflow and skill level. By following the methods outlined in this guide, you’ll avoid bounced emails, speed up your communication, and ensure your photos arrive looking great without unnecessary bulk. Start applying these techniques today, and enjoy faster, more efficient email experiences.
FAQs
Q1: What is the maximum photo size I can email?
Most email providers, including Gmail and Outlook, limit total attachment sizes to 25MB. However, individual photo files are typically much smaller, so this limit usually only becomes an issue when sending multiple high-resolution images at once.
Q2: Does reducing photo size for email reduce quality permanently?
If you create a compressed copy while keeping the original file untouched, the original quality remains intact. Always work with a duplicate file when compressing for email.
Q3: What’s the best format to use for emailing photos?
JPEG is generally the best format for emailing photos due to its balance of quality, file size, and universal compatibility across devices and email clients.
Q4: Can I send multiple photos in one email without exceeding size limits?
Yes, by compressing each photo individually before attaching, or by using a cloud storage link (such as Google Drive or Dropbox) for larger collections of images.
Q5: Will reducing the photo size affect how the image looks when printed?
Yes, significantly reduced resolutions are best suited for screen viewing. If the recipient needs to print the photo, consider sending a higher-resolution version or providing a download link to the full-quality file.